

“The Local Device Name is Already in Use” error commonly plagues Windows PCs and can be brought about by several things. This error often occurs when two or more devices share the same name.
This type of conflict usually manifests in the registry or when two devices with duplicate names exist on the same network.
Many people have encountered the error message, “The local device name is already in use.” Fortunately, this issue can be resolved relatively easily. The steps below will show you how to fix the problem. Follow these directions, and the error should be fixed.
What Does It Mean If The Local Device Name Is Already In Use?
While there are many reasons why this error might occur, it is important to identify the direct cause to troubleshoot effectively.
It can save you time and help you choose just the right method to get the job done, so make sure you check out our list of causes below:
- Drive mapping has gone wrong: Network drive mapping involving computer systems can sometimes lead to errors like this in driving letters.
- Some drive letters are unassigned: Certain drives may either not use a letter they want to use or have an error that causes this.
- File and Printer Sharing is disabled: Networking may become difficult and plagued with errors if this option is disabled in most firewalls.
- No space on the server: Users have said that they had to shut off at least a couple of gigabytes from the foundational drive of the server s host to help with the problem.
Remember that these are just some potential causes of this error message.
How Do I Fix The Local Device Name Is Already In Use?
Are you struggling with the Microsoft Windows network the local device name is already in use error? If you don’t know how to fix it, try the following solutions.
1. Remap The Drive Using Command Prompt
If you have ever gotten the error message “The local device name is already in use” on your Windows computer, don’t worry. This is a common error that can happen for many different reasons.
However, there is a simple fix that you can use to remap the drive using Command Prompt:
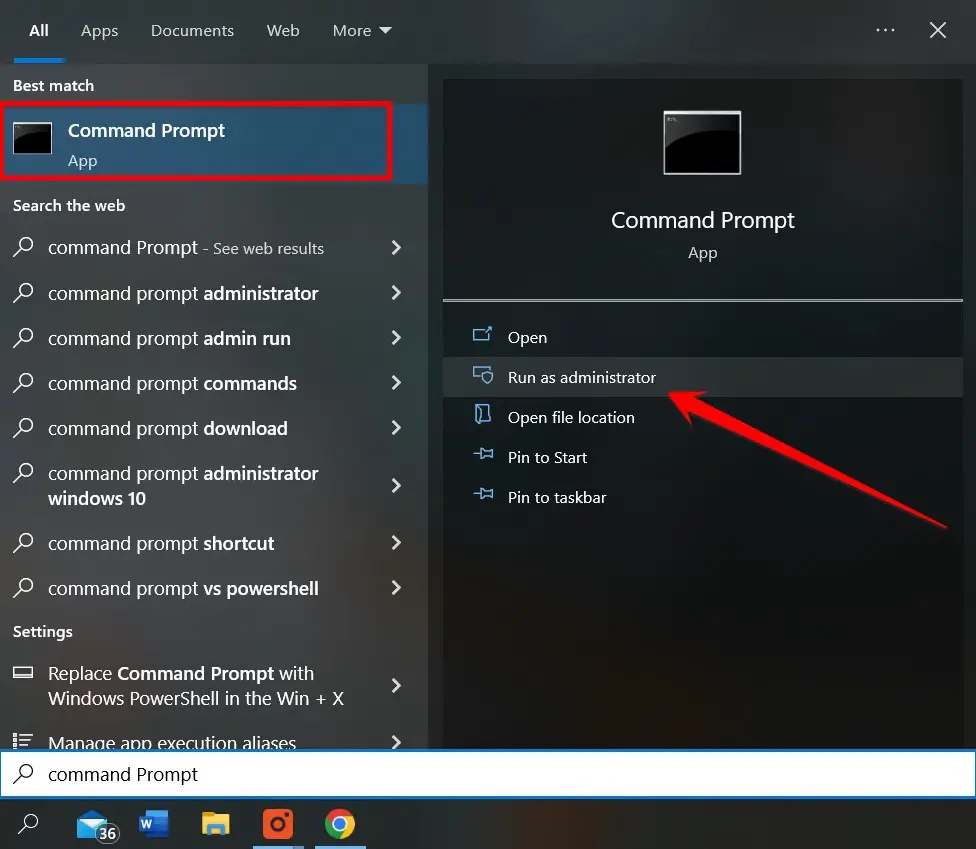
- First, open Command Prompt as an administrator.
- Copy and paste the following command in the Command Prompt and press Enter.
net use * /delete- When this command completes its process, paste the following command into the Command Prompt and press Enter.
net use Z: \\server\share /user:username password- Here, you need to add the desired username and password and check whether this error is solved for your PC.
Related: How To Fix Unexpected Store Exception Error In Windows 10
2. Reinitializing Computer Browser
Reinitializing your computer’s browser can fix Windows’s “the local device name is already in use” error. Some factors, including an outdated or corrupted browser, a conflict with another program, or a problem with the Windows registry can cause this error.
Reinitializing your browser will reset it to its default settings and hopefully resolve the issue.
To do this, you need to follow these steps:
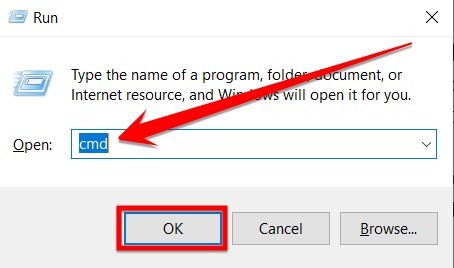
- To do this, open up your “Run” dialogue box (Windows + R), type in “cmd,” and press Enter.
- Now type the following command and press Enter.
net stop "Computer Browser- Wait for the previous command to execute it, then give this restart command to restart this computer browser.
net start "Computer Browser"- In the last step, restart your PC and check whether this issue is gone. If you still face the same issue, then you need to follow the next method, which can be given below.
3. Enable File And Printer Sharing
Enable File And Printer Sharing to fix the ‘The Local Device Name is already in Use’ error on Windows PC. This simple fix will enable you to share files and printers between your computer and others on your network.
Here’s how to do it:
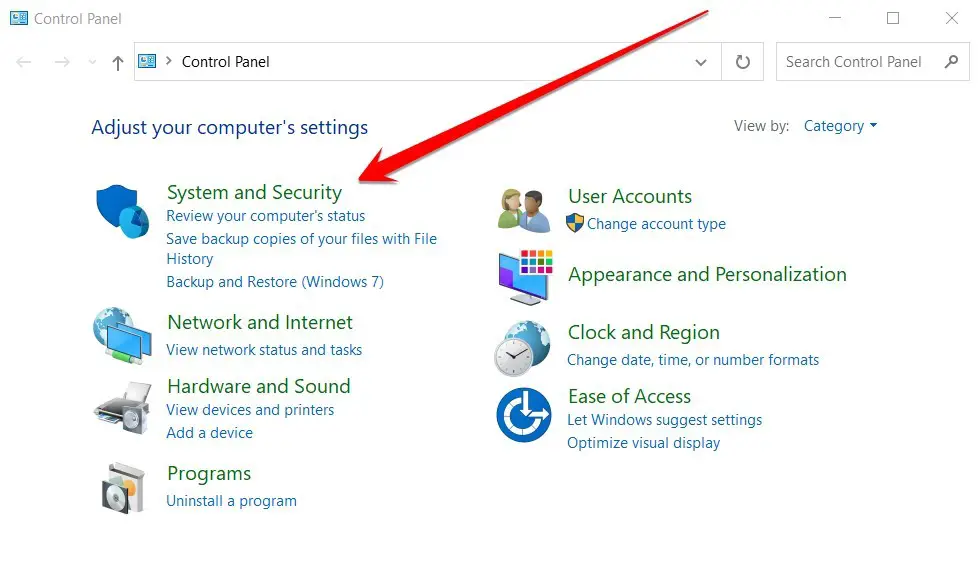
- Go to Control Panel and then click on the System and Security option.
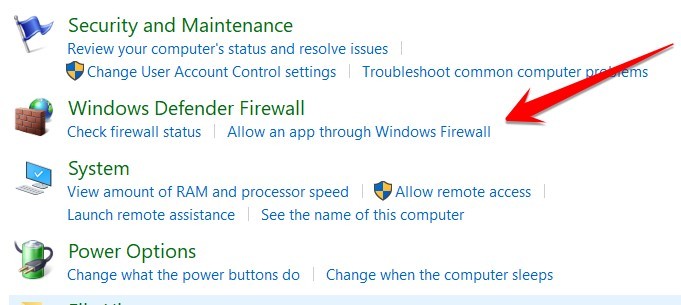
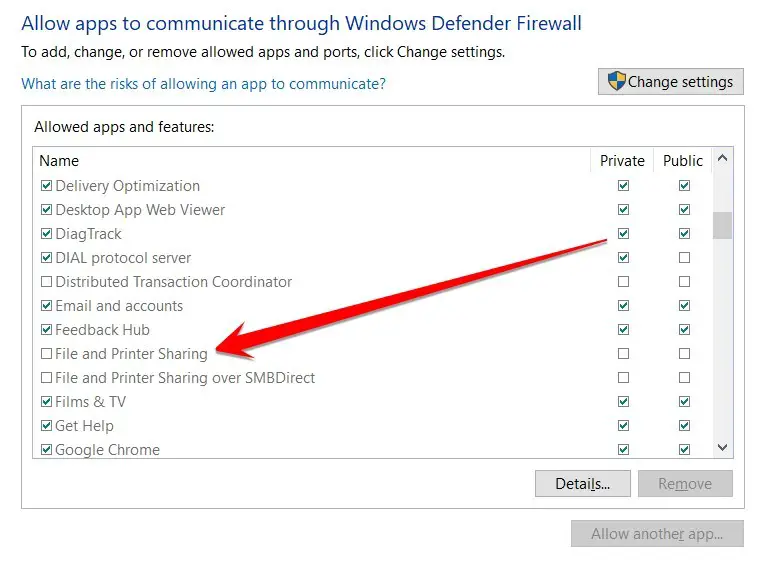
- Find the Windows Defender Firewall option on the Allowed Apps dialog box.
- Tap Allow an app through Windows Firewall to turn it on.
- You need to click on “Change settings” in this popup window.

- Navigate to the File and sharing option and check the boxes.
- After completing this setup, you need to restart your PC and check whether this issue is gone.
4. Delete the Mountpoints2 Key
We have all Googled a Windows error that we cannot fix, no matter how many times it pops up. My particular error was the ‘local device name is already in use’ error. I tried multiple solutions but kept getting stuck. That was until I found the one solution that worked.
All you need to do is delete the Mountpoints2 key from the registry editor and reboot your system. The steps are as follows:
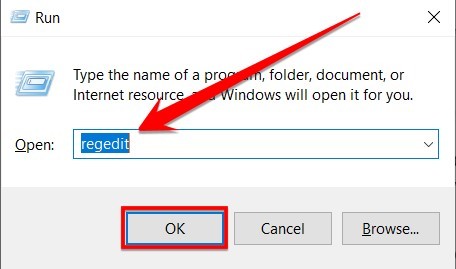
- Press the Windows key + R to open the Run dialog box, type “regedit” and press enter to continue.
- In the Registry Editor, go to
HKEY_CURRENT_USER\Software\Microsoft\Windows\CurrentVersion\Explorer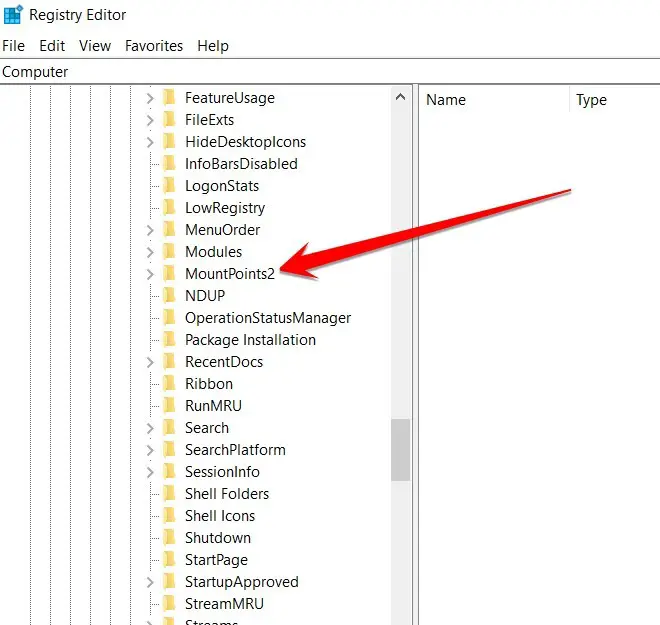
- Delete the Mountpoints2 key from the left pane, close the Registry Editor and restart your computer, and restart your PC to check if this issue still exists.
Frequently Asked Questions
How Do I Restore A Network Connection To A Shared Drive?
First, check the network connection between your computer and the router. If the light on the router is amber or red, then there is no connection. Check the Ethernet cable to ensure it is firmly plugged into the computer and the router.
If the cable is loose, try unplugging it and plugging it back in. Also, check to see if any other devices on the network are having difficulty connecting. If so, restarting the router may help. If the problem persists, contact your ISP for assistance.
Second, check to see if the shared drive is accessible from another computer on the network. If not, the problem is most likely with the drive itself, not the network connection. Try restarting the computer that houses the shared drive.
If that does not work, try unsharing and then resharing the drive. Finally, check the permissions on the shared drive to ensure you have access. If all else fails, contact the administrator of the shared drive for help.
Do I Have To Wait 5 Minutes For Network Reset?
No, you don’t! You can reset your network in just a few simple steps.
- Disconnect all power sources from your router and modem.
- Unplug the Ethernet cable from your computer.
- Wait for 30 seconds, and then plug everything back in.
- Once your computer has been reconnected to the network, you can access the internet without any problems.
So, there you have it! You don’t need to wait 5 minutes for a network reset. Just follow the steps above, and you’ll be back online.
How Can I Get A List Of A Network Drive?
The net use command is a very useful tool for managing network drives in Windows. It allows you to list all of the mapped drives and their UNC paths, which can be very helpful if you need to find the path for a specific drive.
To use the net use command, follow these steps:
- Open the Command Prompt by clicking the Start menu and selecting Run.
- In the Run window, type cmd.exe.
- When the Command Prompt window opens, type the following command:
net useThis will list all of the mapped drives and their UNC paths. If you need to find the UNC path for a specific drive, look for it in the list. The net use command is a very handy tool to keep in your arsenal when working with network drives in Windows.
Why Do Mapped Drives Not Reconnect?
The most frequent cause of this is that the user doesn’t have permission to access the shared drive. Another possibility is that the network share has been moved or renamed. If the drive were mapped using an IP address, it would no longer work if the server’s IP address changed.
If the computer is not connected to the network when it starts up, then any mapped drives will not be accessible until the computer connects to the network.
There are a few solutions to this problem.
- First, make sure that you have permission to access the network share.
- Second, reconnect to the network share using its new name or location.
- Third, try remapping the drive using the server’s new IP address.
- Finally, if all else fails, you can connect to the network share manually each time you start your computer.
How Do I Find A Lost Mapped Drive?
First, check if My Computer or File Explorer still lists the mapped drive. If it is, try double-clicking on it to see if it will open. If not, right-click on the mapped drive and select “Disconnect.”
Then try remapping the drive by going to Start > Run and typing in the drive letter followed by a colon (:). If that doesn’t work, try restarting your computer. Sometimes mapped drives disappear after a restart, but they should reappear once you log in.
It may have been disconnected from the server if you still can’t find your mapped drive. You’ll need to contact your network administrator for help if this is the case. They should be able to tell you where the mapped drive is located and how to reconnect to it.
How Do I Remove A Mapped Network Drive?
Mapped network drives are connections to networked locations that you can access like any other folder on your computer. If you no longer need access to a mapped network drive, you can remove it by disconnecting it from the network location.
Follow these steps:
- Open File Explorer and click on This PC in the sidebar.
- Find the mapped network drive you want to remove from the list of drives and right-click on it.
- Select Disconnect from the menu.
- Confirm that you want to remove the mapped network drive by clicking Yes.
Once you remove a mapped network drive, it will no longer appear in File Explorer. If you ever need to access it again, you can remap the drive by following the same steps above and selecting Connect instead of Disconnect.
How Do I Clear All Network Connections?
Here’s a quick guide on how to clear all network connections in Windows:
- First, open the Network and Sharing Center by clicking the Start button and selecting Control Panel.
- Next, click on “Change adapter settings.” Now, right-click on each active network connection and select “Disable.”
- Finally, restart your computer, and all your network connections should be cleared.
Remember that this process will also disable any wireless network adapters installed, so you’ll need to re-enable them after restarting your computer. Clearing all network connections is easy once you know how.
Conclusion
We’ve learned how to change your device name and given some troubleshooting tips in case things go wrong. Hopefully, you feel confident enough to make the change independently (or with a little help from us).
If you found this article helpful, please Spread the Word by sharing it with your friends on social media.
Thank you for reading!


