
Windows Update Error 0x80240034 is a very common error message. It’s also one of the most frustrating to deal with because it usually means that Windows can’t download or install updates for some reason.
This blog post will give you information about what this error means, how to fix it, and why you’re seeing this problem in the first place.
What Does Error 0x80240034 Mean?
This is an error that appears to halt the updating process on Windows 10. The error comes up because the Windows Update Services are failing at some point.
They tend to occur because of a damaged PC configuration caused by corrupted or some missing files, compatibility in software, and many other reasons that need a separate fixing methodology.
Solution 1: Run the Windows Update Troubleshooter
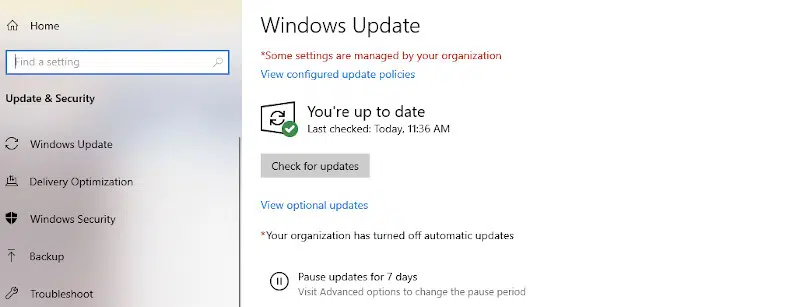
To resolve the Windows 10 Update Error 0x80240034, you need to run the Windows Update Troubleshooter tool.
Here are the steps you need to follow:
- Click on Start > Settings > Security & Updates > Troubleshoot > Windows Update.
- You should proceed and restart your PC afterward.
- Then try and install the Windows 10 Updates.
Solution 2. Turn off the Windows Developer Mode
The “Developer Mode” is one of the main causes of the Windows Update Error 0x80240034. Therefore, if your system has the Developer Mode installed in it, you need to disable it as quickly as possible.
To disable it, you need to do the following:
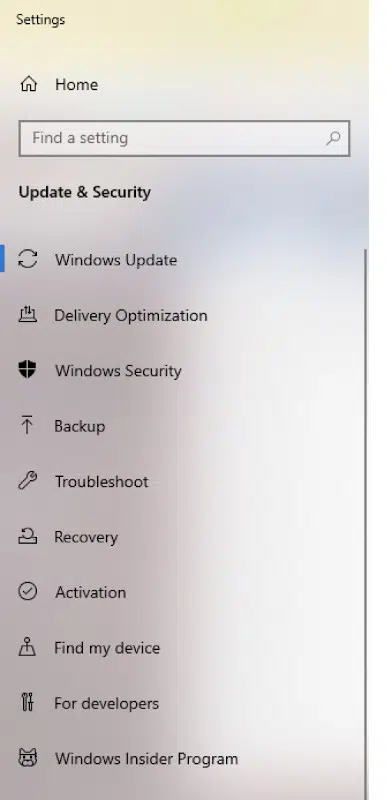
- Start by going to Settings > Update & Security > Select the section “For developers” on the left side.
- Under the developer’s features, select Sideload Apps.
- Proceed and click Yes on App Sideloading.
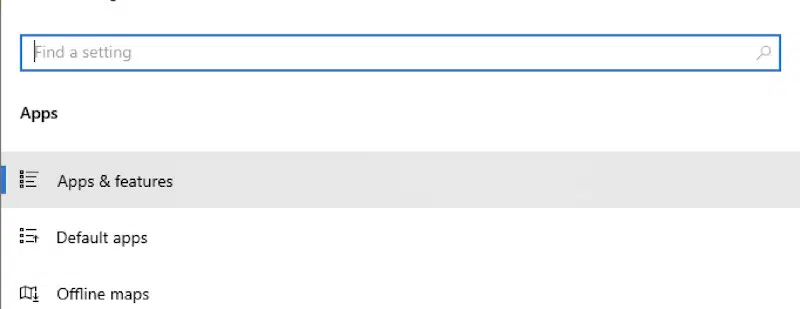
- Proceed to Setting > Apps > Apps & features > Manage optional features.
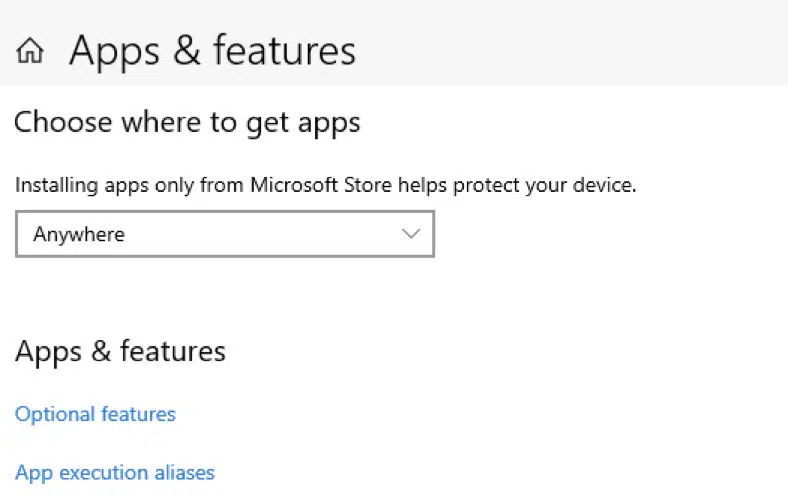
- Then click on Windows developer mode and then click Uninstall.

- Restart your Pc and update Windows. The error 0x80240034 should not pop up again while the Windows 10 Update process is in progress.
Solution 3: Delete the “SoftwareDistribution” Folder
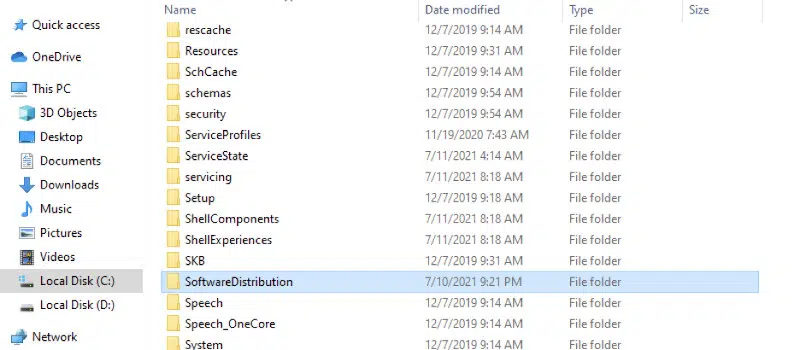
One thing you should be aware of is that the C:\Windows\SoftwareDistribution folder is the location where Windows stores all the Windows Updates files.
Most of the time, the folder turns out to be corrupted and you need to re-create it to download the updates right from scratch.
To re-create (rebuild) the SoftwareDistribution folder, carefully follow these steps:
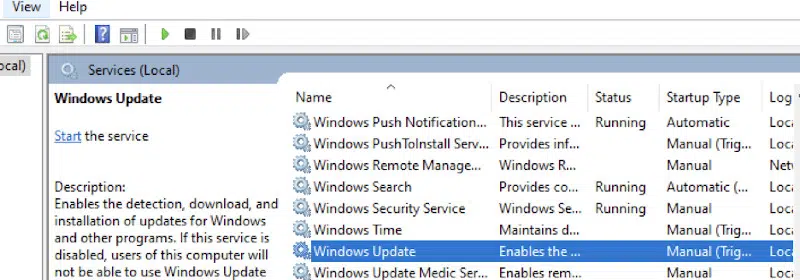
Step 1: Windows Update Service
- You should begin by opening the Windows Service Control Panel.
- Begin by pressing the Windows + R keys to open the Command box.
- Under the search box, type: service.msc and click OK.
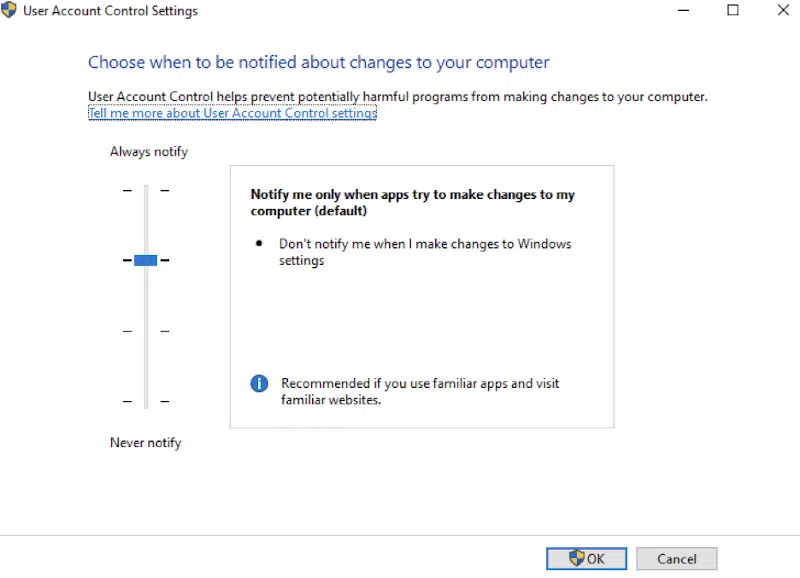
- Accept the UAC warning once it appears.
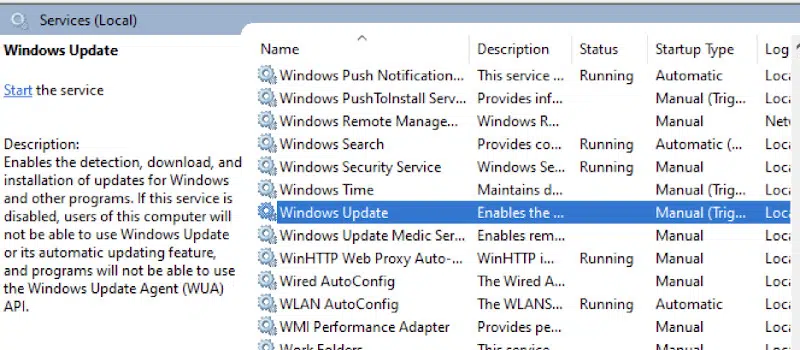
- Proceed to the Service Control Panel and look for the “Windows Update” service.
- Go ahead and right-click on it and then select Stop.
Step 2: You need to delete the SoftwareDistribution folder.
- The first thing you need to do is open Windows Explorer and navigate to the C:\Windows folder.
- Proceed to finding and deleting the SoftwareDistribution folder or you can also choose to rename it.
Step 3: Begin updating the windows once again.
To begin that process, you need to do the following:
- First, open the Windows Service Control Panel.
- Right-click on Windows Update Service and select the Start button.
Step 4: Check and install Windows 10 Update
- You should navigate to the Settings section, then proceed to the Update and Security section, and then click the check for updates section.
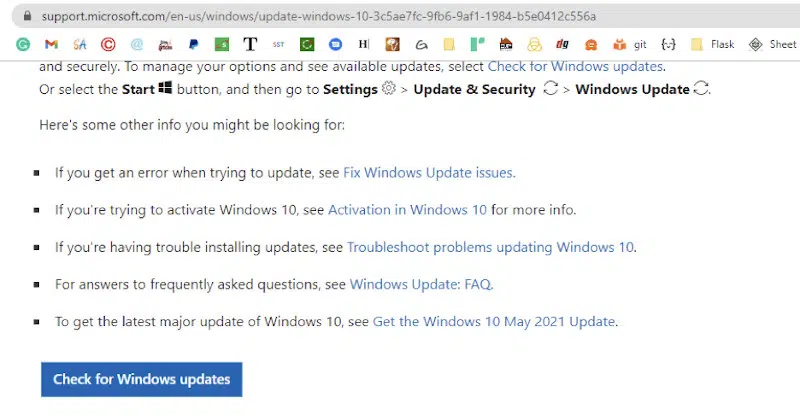
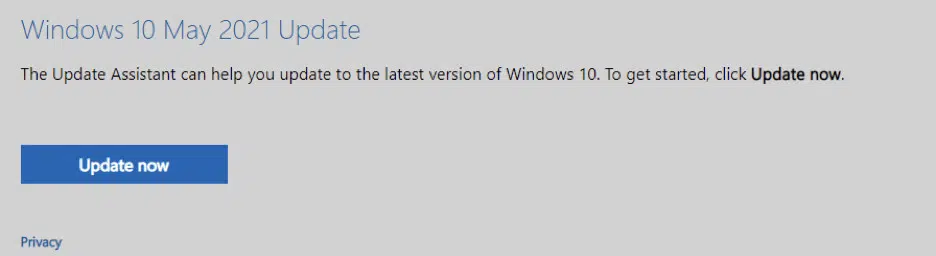
Solution 4: Update Windows 10 by Using the Update Assistant
This method requires you to navigate to the Windows 10 download site and once you are there, you need to click the Update now button.
- You should then save the Windows10Upgrade9252.exe file on your desktop.
- The next thing you need to do is click on the file you just downloaded and proceed to open the Windows Upgrade Assistant.
- The next thing you should do is click the Update now option
- Allow Window 10 to complete the download and verification process.
- Once the verification process hits a hundred percent, you should immediately disconnect your computer from the internet or set it on flight mode.
- What you should do next is wait for the Windows Update process to complete.
- If you are prompted, you can as well restart your system and install the update
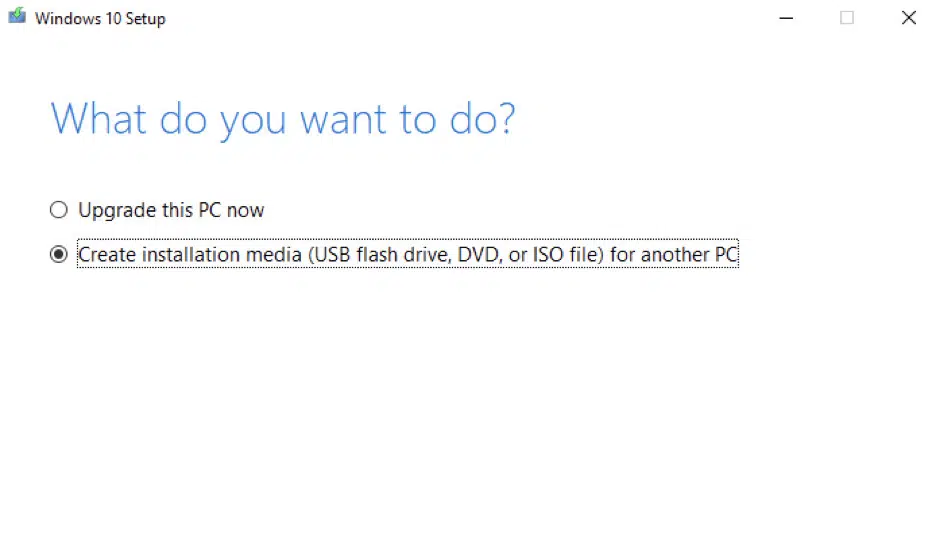
Solution 5: Update your Windows 10 From USB/ISO
In this method, one will try fixing the Windows 10 Update Error 0x80240034 by updating Windows 10 from a USB/ISO.
The process of doing this goes as follows:
Step 1. First, you need to download Windows 10 in an ISO file format.
- To do that, you will have to navigate through the Window 10 download page and ensure that you’ve downloaded the Media Creation Tool.
- You need to run the ‘Media Creation Tool’ and then accept the terms and conditions of the license as indicated on the first screen.
- Proceed and select ‘Create installation media for another PC’.
- Once you get to the ‘Language, architecture and edition’ screen click Next.
- Now select ISO file and click Next.
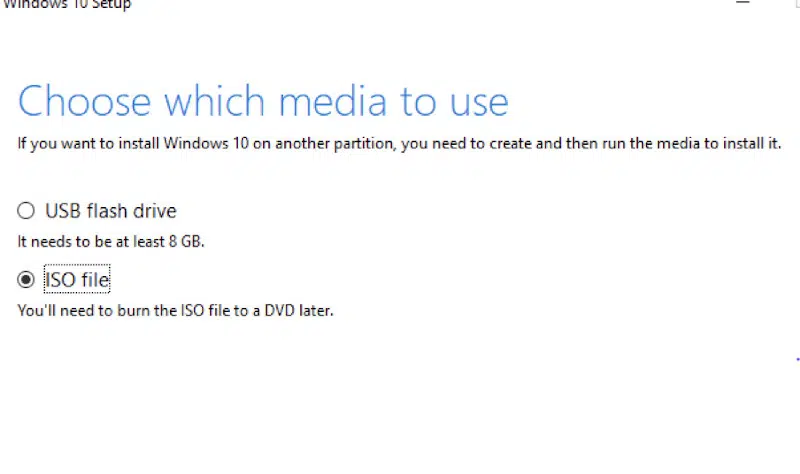
- Click save the ‘Windows.iso” file to your desktop.
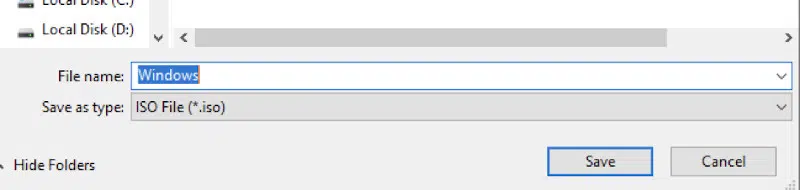
- After doing that, the Media Creation Tool will begin downloading the Windows 10 in an ISO format.
- Once the download process has been completed, you should proceed and close the Media Creation Tool.
Step 2. You should now update Windows 10 from the ISO file.
- To start with, you need to make sure that your computer is under no internet connection. Setting it on airplane mode can also help.
- Make sure that you’ve uninstalled any third-party antivirus.
- What you need to do next is right-click on the Windows.iso file on your desktop and then click on Mount.
- Proceed and double click on the setup application.
- On the screen that pops up, select the ‘Not right now’ option and then click Next.
- Then follow up with the rest of the onscreen instructions and make sure your system is updated.
Solution 6: Clean and Install Windows 10
In this method, you will have to perform a clean installation of Windows 10 on your system to fix the Windows Update issues.
An important thing to note is that cleaning the Windows 10 installation system simply means that all your settings and files are likely going to be lost during the installation process. Therefore, you should make sure that you’ve backed up all important files.
To effectively clean install Windows 10, you will require the following:
- You need to back up your files. Installing a clean Windows 10 means that you will lose all your settings and files in the installation process. Therefore, backing up your files is important. You can safeguard them on an external storage device.
- You will need a Windows 10 installation USB media. If you do not have a windows 10 USB installation media, you can create one using Microsoft’s Windows 10 Media Creation Tool.
Make sure that you have disconnected all the external devices that you do not need during the installation process. That is a very important point to note.
The process of clean installing Windows 10 from USB:
- To start with, you need to power on your system and then proceed to press the corresponding “Boot options” key. In most cases, it is usually the F12 or F8 key. You should then choose to start the system from the Windows 10 installation media you have. It could be a DVD or a USB.
In case you do not have the Boot options key, you can alternatively key in your BIOS settings and define it as First Boot Device at Boot Order settings the USB installation media or your DVD in accordance to the media you have created.
- Once the Windows setup screen appears, you need to choose your language, time, and method of input. After doing that, click Next.
- Then click on the ‘Install now’ option.
- A screen will appear and you will be required to perform the corresponding action according to your case.
For the first time install: you need to type a valid Windows 10 key and then click Next if you are installing Windows 10 for the first time on your computer.
Second-time installation: in case you have installed and activated Windows 10 on the same computer before, you need to select the option of “I don’t have a product key”. (Windows 10 should now be activated right after installation).
- You need to accept the terms and conditions of licensing and then click on “Next”.
- Go ahead and select custom: Install Windows only (Advanced).
- Make sure that you’ve deleted any partitions if listed and then click on unallocated space. After doing that, click Next.
- Be patient and wait while the Windows Setup is installing process continues.
- If prompted, you can click Use Express Settings.
- The next screen will appear if you run Windows 10. You have to choose who rightfully owns the PC. If that is the case, click on “My organization” if your computer belongs to a particular domain, or choose the “I own it” option if it is a local (personal) computer. Click next and continue.
- In the “Make it yours” screen, key in your Microsoft account username and password. This will enable you to sign in to windows 10. You can also choose the “create one” option link to create a new Microsoft account. If you don’t need any of the two options, you can select the “Skip this step” option link and sign in with your local account.
- Proceed and type your username and password, but if it’s a new account, click Next.
Give your PC time to complete the Windows 10 clean installation process.
Frequently Asked Questions
How to Fix Windows Update Error 0x80240034?
Once you realize that the windows update process cannot be completed because of this error, the first thing you should do is use the windows update troubleshooter. That is the easiest method but if it doesn’t work, you can try other comprehensive methods as discussed in this guide.
Is There a Problem Associated with Windows 10 Update?
In case there is an issue associated with running the Windows Update, there is a high likelihood that the PC has multiple system files that are corrupted. The best thing you can do is try fixing them using the System File Checker Tool.
Why is My Windows 10 Update Not Working?
In case you are having issues with the Windows 10 Update, the easiest way to fix it is to run the built-in troubleshooter. That should fix the problem once and for all and the update process should be complete without any issues.
What Does the Error 0x80240034 Mean When One is Installing Windows 10 Update?
The main cause of the error 0x80240034 in windows 10 update is the “Developer mode”. In case the developer mode is active and enabled on your system, you should proceed immediately and disable it.
To do so, you should go to Settings, then move on to Update and Security and then select for Developers on the left.
Why is My Computer Not Updating?
In case your PC is unable to complete an update, you should make sure that it is connected to the internet and you have enough space on your hard drive. You can also try rebooting your pc or check if the windows divers are installed correctly.
How do I Clear the Windows Update Download Cache?
To do this, you need to go to the “C:\Windows\SoftwareDistribution\Download” folder. What you need to do next is press CTRL+A and then press deletes to get rid of these folders and files completely.
How to Fix a Windows Update That Has Stopped the Download Process?
In case the updates stopped and are at the “Pending Install” or “Pending Download” state, go to the “Update Settings” and then go to “Advanced”.
You will find the slider reading as follows: “Allow updates to download over metered connections.” If you slide this “on” the updates will resume the download process and complete the installation process.
Conclusion
The Windows Update Error 0x80240034 is a common problem encountered by users while updating the Windows 10 operating system. If you are facing this error while trying to update your Windows 10, try the solutions discussed in this article.


