
Is your computer displaying a green light on the power supply, indicating it’s receiving power but not turning on? You are certainly not alone in this predicament. It’s a prevalent issue for many people, and we can offer you some simple solutions.
In this article, I will explain what typically causes this situation, how to diagnose it, and preventative measures so that you won’t experience another failure like this again.
How To Fix Power Supply Green Light But Computer Won’t Turn On
The steps I outline below should help you get to the root of the problem and get your device up and running again.
Possible Causes of “Green Light on Power Supply but No Power”
There are a few different things that could be causing your device to have a green light on the power supply but still not receive power.
Some of the most common reasons include the following:
- Loose or damaged power cables
- Defective power supply
- Failed component on the motherboard
- Corrupted operating system
Below, I’ll go into more detail on each of these potential causes and provide instructions on diagnosing and fixing them.
Fixing Loose or Damaged Power Cables
One of the most common reasons for a device to have a green light on the power supply but not receive power is a loose or damaged power cable. If the cable that connects the power supply to the device is loose or damaged, it won’t be able to transmit power effectively.
To diagnose this issue, you’ll need to unplug the device from the wall outlet and check the cables for any visible signs of damage, such as fraying or exposed wires. If you don’t see any apparent damage, try wiggling the cables gently to see if they’re loose.
If you do find that the cables are loose or damaged, the fix is relatively simple: replace the cables with new ones. You can purchase replacement power cables from most electronics stores or online retailers. Just make sure to get the correct type of cable for your device.
Fixing a Defective Power Supply
If the power cables are in good condition and securely connected, the power supply is the next thing to check. If the power supply is defective, it won’t be able to transmit power to the device, even if the power cables are in good condition.
You’ll need to open up the device and inspect the power supply unit (PSU) to diagnose a defective power supply. If you’re uncomfortable doing this, it’s probably best to take the device to a professional.
However, if you do feel comfortable opening up the device, here are the steps you should follow:
- Unplug the device from the wall outlet and remove the battery (if applicable).
- Disconnect any other cables connected to the device, such as HDMI or USB cables.
- Depending on the type of device you’re working with, there may be screws or clips that hold the case in place. Locate these and remove them to open the case.
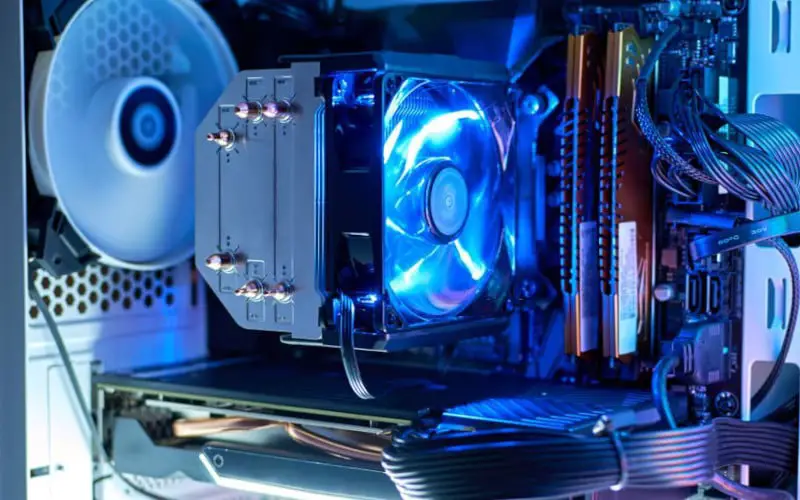
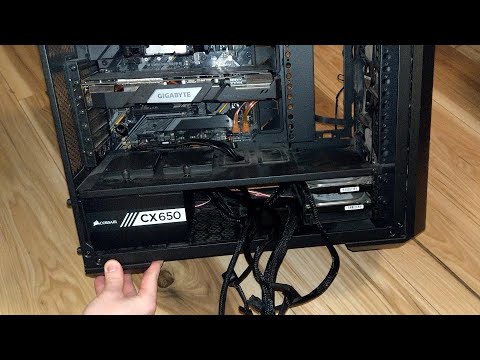
- Once you have the case open, you should be able to see the power supply unit (PSU). It’s typically a large metal box with a fan and several cables coming out of it.
- Inspect the PSU for any visible signs of damage, such as scorch marks or bulging capacitors. If you see any of these signs, it’s likely that the PSU is defective and needs to be replaced.
- If the PSU looks in good condition, you can test it using a multimeter to measure its voltage.
To use a multimeter to test the voltage coming from the PSU, follow these steps:
- Ensure the device is unplugged from the wall outlet and the battery is removed (if applicable).
- Locate the power cables from the PSU and the voltage test points. These are typically labeled with the voltage they’re supposed to output (e.g. +12V, -12V, +5V).
- Set your multimeter to the appropriate voltage range and touch the probes to the test points.
- If the multimeter reads the correct voltage, the PSU is likely functioning properly. If the reading is significantly different from the expected voltage, the PSU may be defective and needs to be replaced.
Related: Corsair RM vs RMX: Which is Better?
If you determine that the PSU is defective, you’ll need to replace it with a new one. This can be a bit challenging, as you’ll need to find a replacement PSU compatible with your device and meets its power requirements. You may need to consult your device’s manual or do online research to find the right PSU.
Once you’ve obtained a new PSU, installing it is relatively straightforward. follow these steps:
- Unplug the device from the wall outlet and remove the battery (if applicable).
- Disconnect any other cables connected to the device, such as HDMI or USB cables.
- Depending on the type of device you’re working with, there may be screws or clips that hold the case in place. Locate these and remove them to open the case.
- Once the case is open, locate the old PSU and unplug all the cables.
- Remove any screws or clips that hold the old PSU in place and carefully lift it out of the case.
- Install the new PSU in the same position as the old one, and secure it with screws or clips.
- Reconnect all the cables to the new PSU and close the case.
- Plug the device back in and try turning it on to see if the issue has been resolved.
Fixing a Failed Component on the Motherboard
The motherboard is next to check if the power supply and cables are in good condition. If a component on the motherboard has failed, it can prevent the device from receiving power, even if the power supply is functioning correctly.
If you’re unsure how to spot a broken element on the motherboard, you should leave this task to an expert. You may need to disassemble the device and examine the board up close. However, if tinkering with tech is outside your comfort zone, professional help might be necessary.
However, if you do feel comfortable opening up the device, here are the steps you should follow:
- Unplug the device from the wall outlet and remove the battery (if applicable).
- Detach any other cords linked to the device, for example, HDMI and USB cables.
- Depending on the device type, you may find screws or clips keeping your case in place. To open it up, identify and remove them accordingly.
- Once you have the case open, you should be able to see the motherboard. It’s typically a large green or brown circuit board with a lot of components on it.
- Inspect the motherboard for any visible signs of damage, such as burnt or discolored components. If you see any of these signs, it’s likely that a component on the motherboard has failed and needs to be replaced.
If the motherboard looks good, you can test it using a multimeter to measure the voltage.
To use a multimeter to test the voltage on the motherboard, follow these steps:
- Ensure the device is unplugged from the wall outlet and the battery is removed (if applicable).
- Locate the power connectors on the motherboard. These are typically labeled with the voltage they’re supposed to receive (e.g. +12V, -12V, +5V).
- Set your multimeter to the appropriate voltage range and touch the probes to the power connectors.
- If the multimeter reads the correct voltage, it’s likely that the motherboard is functioning correctly and that the issue lies elsewhere. If the reading is significantly different from the expected voltage, it’s possible that a component on the motherboard has failed and needs to be replaced.
If you determine that a component on the motherboard has indeed failed, you’ll need to replace it with a new one. This can be a bit of a challenge, as you’ll need to find a replacement component compatible with your motherboard that meets its power requirements.
You may need to consult your device’s manual or do online research to find a suitable component.
Once you’ve obtained a new component, installing it is relatively straightforward. Just follow these steps:
- Disconnect the device from its power source and remove the battery (if necessary).
- Before you start, be sure to unplug any HDMI cables or USB cords that are linked to the device.
- Depending on your operating device, it’s likely to have screws or clips securing its casing. To open up this case, locate these and take them off first.
- Once the case is open, locate the failed component on the motherboard.
- Carefully unplug any cables or connectors that are connected to the failed component.
- Remove any screws or clips holding the failed component using a screwdriver or other appropriate tool.
- Carefully lift the failed component off the motherboard.
- Install the new component in the same position as the old one, and secure it with screws or clips.
- Reconnect any cables or connectors that were connected to the failed component.
- Close the case and plug the device back in.
- Try turning the device on to see if the issue has been resolved.
Related: Best Motherboards for Ryzen 7 3700X
Frequently Asked Questions
Here are some common questions and answers about troubleshooting and fixing a device that has a green light on the power supply but won’t turn on:
How do I know if the problem is with the power supply or the motherboard?
To determine if the problem is with the power or motherboard, you’ll need to open up the device and inspect the power supply unit (PSU) and motherboard directly. If the PSU looks in good condition and outputs the correct voltage, the issue is likely with the motherboard.
If the PSU is defective or not outputting the correct voltage, the issue is likely with the power supply.
How can I test the power supply to see if it’s working properly?
To test the power supply, you can use a multimeter to measure the voltage from the PSU. Follow the steps outlined in the “Fixing a Defective Power Supply” section above to test the voltage on the PSU.
If the multimeter reads the correct voltage, the PSU is likely functioning properly. If the reading is significantly different from the expected voltage, the PSU may be defective and needs to be replaced.
How can I test the motherboard to see if it’s working properly?
To test the motherboard, you can use a multimeter to measure the voltage on the power connectors. Follow the steps outlined in the “Fixing a Failed Component on the Motherboard” section above to test the voltage on the motherboard.
If the multimeter reads the correct voltage, it’s likely that the motherboard is functioning properly and that the issue lies elsewhere. If the reading is significantly different from the expected voltage, it’s possible that a component on the motherboard has failed and needs to be replaced.
What should I do if I can’t fix the problem myself?
If you cannot fix the problem yourself after following the troubleshooting steps outlined in this article, it’s probably best to take the device to a professional for repair. A professional will be able to diagnose and fix the issue more quickly and efficiently, and they’ll also be able to help you with any other problems you might be experiencing with your device.
Alternatively, you may be able to find help and support online by posting about your problem on forums or reaching out to the manufacturer or vendor for assistance.


