

Windows comes with a built-in troubleshooting tool that allows you to diagnose connectivity issues on your computer. Once the problem is detected, the tool automatically fixes it. There are times when it will highlight the issue and recommend probable solutions.
There are also times when the network troubleshooter describes the problem without suggesting a probable solution.
A very good example is when you see an alert sign on the internet icon on your computer’s screen. Try to double-click on the ethernet name and troubleshoot. An error Windows Could Not Automatically Detect This Network’s Proxy Settings will pop up. The message communicates that there is a problem with the proxy settings of your network.
In most cases, the error may be caused by a change in the proxy settings of Windows 10. An alteration of the settings can be a result of a change in the network settings.
Another cause can be corrupted system files that may result in changes in the network settings. All of these can be caused by malware or because of some issues with the files on your computer that will prevent an internet connection from being established in Windows 10.
Before moving on to other possible solutions, you should go through the general troubleshooting and see if get rid of the issue. If general troubleshooting methods fail, you should try other solution methods.
Solution 1: General Troubleshooting
To start with, you need to make sure that you have the correct and latest drivers for your network adapter. Here are the steps you should follow to solve any driver issues.
- Press the Windows + R keys.
- Then type devmgmt.msc on the Search icon and press the Enter button.
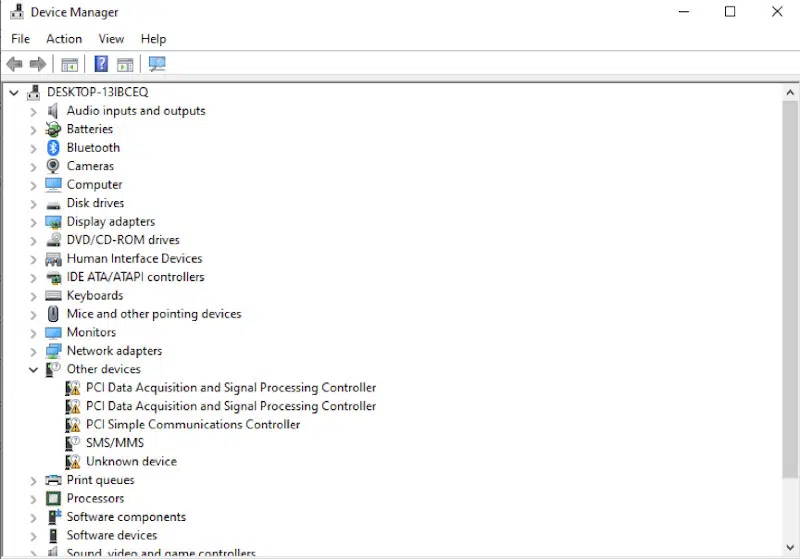
- Select the Network adapters and double-click on it.
- Select on the Network devices, right-click on it and select Uninstall.
- The moment the uninstallation process completes, close the Device Manager and then reboot your computer.
- What follows is the computer automatically uninstalling the drivers that are associated with the device.
You can also use the Windows own Network Adapter Troubleshooter because it can also fix the issue. It will save you time and effort because it solves the issues on its own.
Here is what you need to do:
- Press on the Windows key once.
- Select the Control Panel.
- Then select Network and internet.
- Proceed and click on the Network and Sharing Center.
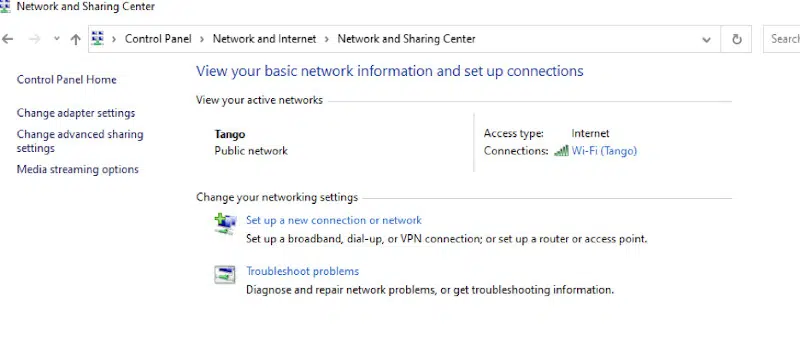
- Proceed and select Troubleshoot problems.
- Select the Network Adapter.
- Then click on the Addvanced Options.
- Look for the option Apply repairs automatically and proceed to the command to run as Administrator.
- Proceed and click Next.
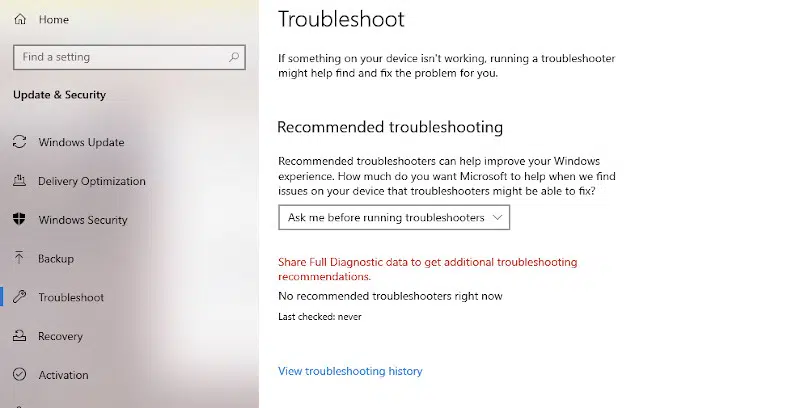
Wait for it to complete, and then confirm if the problem has been resolved.
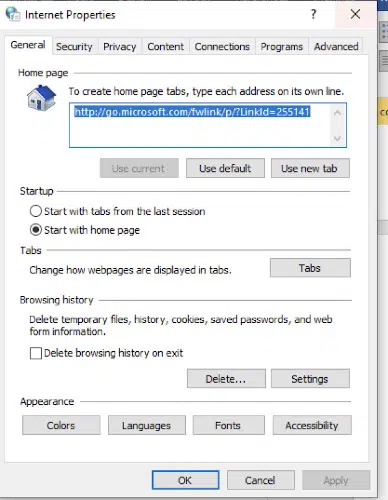
Resetting the Internet Explorer Settings
Altering the settings of Internet Explorer also solves this issue. Doing this deletes your settings so you need to be aware of that.
Here is what you need to do:
- Press the Windows + R keys.
- On the Search icon that opens up, type inetcpl and then press Enter.
- Select the Advanced tab.
- Then select the Reset option.
- Check the option indicating delete personal settings.
- Then click Reset.

After completing this step, you should restart your computer and confirm if the issue has been resolved.
An alternative method includes the following:
- Press the Windows + I to open the settings.
- Select the Network and internet option.
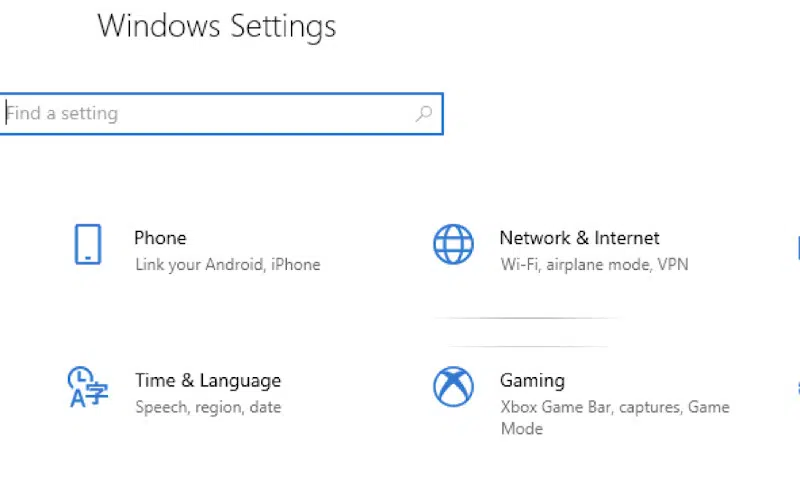
- Proceed and click on Proxy from the left pane and make sure you’ve unchecked the Use a Proxy Server option.
- Then confirm if the issue has been resolved.
Solution 2: Reset the Network Configurations
To do this solution, the first thing you should do is reset Winsock using the commands indicated below. You should follow the commands keenly to perfectly reset the Winsock settings to their clean default state.
Therefore, if any changes were made and are causing the issue, you can try the method indicated below to solve it.
- Press the Windows key once.
- On the Search icon, key in cmd.
- Proceed and right-click on the Command Prompt option and then accept to Run it as administrator.
- Proceed and type the command highlighted below. Proceed by pressing the Enter button
netsh winsock reset catalog- After running the command highlighted above, you should reboot your computer and confirm if the issue has been resolved. If the issue hasn’t been resolved, proceed to the next step.
Type in the following command:
netsh int ipv4 reset reset.log- Then proceed and type the following:
netsh int ipv6 reset reset.log
ipconfig /flushdns
ipconfig /release
ipconfig /renew- Proceed and type exit and then press the Enter key.
After doing that, you should restart your computer and confirm if the issue is resolved.
Solution 3: Disable Automatic Proxy Settings Check
Here is another method you can use to resolve the issue “Windows Could Not Automatically Detect This Network’s Proxy Settings”. What you should do is uncheck the proxy server options, and the issue should be resolved.
What you are doing, in this case, is turning off the option that commands your computer to use certain proxy settings. It doesn’t matter if you turned those settings on by yourself or not.
Turning them off is a good idea as it allows the windows to automatically detect the proxy settings.
You should note that if the issue has something to do with your computer, you should try using the Restore repair option. It has the capability of scanning the repositories. It also replaces all the corrupt files and those that are missing. In most cases, this method works if the issue originated from system corruption.
To fix the issue through this method, here is what you need to do:
- Press the Windows + R keys.
- Then type inetcpl.cpl and the Enter key.
- Select the Connections tab.
- Select the LAN Settings button.
- You should uncheck the option that is written Use proxy serves for your LAN (these settings will not apply to dial-up or VPN connections) that is under the proxy server section.
- Proceed and select OK and then click OK again.
After doing all that, you should check if the issue has been resolved.
Solution 4: Check for Malware and Virus
There are instances when the cause of this problem may be viruses and malware. Some viruses will alter your Internet Settings to either stop the computer from accessing the Internet or make all your traffic head towards their preferred settings so that it can all be watched.
The occurrence of such an instance can happen. It can be an issue for you if you’ve not installed anti-virus on your computer. The issue can also come up after you’ve installed new software.
There are a few steps you need to follow to confirm whether the issues have been brought about by malware.
They include the following:
- Use your preferred anti-virus software and do a full scan on your computer. Just make sure you are using a reliable anti-virus software.
- Proceed and scan your computer and confirm if it has any infection. In case the anti-virus software finds some corrupted files, make sure you delete them.
After doing that, restart your computer and confirm if the issue has been fixed.
Solution 5: Restore Your Windows from System Restore
In case the issue has been caused by altering the settings for reasons related to file corruption or infection, then performing a system restore can be a very good option. Performing system restore is a great idea if the issue just started after downloading a particular software.
Performing a system restore brings you back to the point you were at before the problem began. Once you perform a system restore, restart your computer and check if the issue has been resolved.
Solution 6: Run an SFC Scan
If the issue is a result of corrupted files, you can try performing an SFC scan. It is a method that has worked and can solve the issue that has caused the alteration of Internet Settings.
What happens is that an SFC scan does a full scan of all the files in your computer replacing the corrupted ones with the correct ones which are then restored in your system.
In case the issue was brought about due to some files that are corrupted, performing an SFC scan should fix this issue.
- Press the Windows key just one time.
- On the Search icon, type cmd.
- Proceed and right-click on the Command Prompt and proceed to select Run as Administrator.
- Proceed and type SFC/Scannow and then press the Enter key.
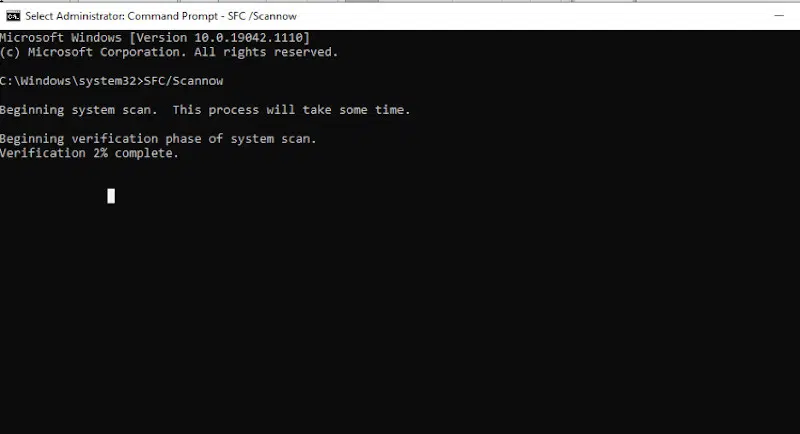
- Give it time to complete.
Once the process is over, restart your computer and confirm if the issue is resolved.
Solution 7: Reset Your Network Through the Settings
In some cases, some configurations or network restrictions may prevent the computer from connecting to the Internet. It is also very possible that some given network configurations may have been outdated on your computer.
The first thing you should do is perform a network reset. Here is how to go about it:
- Press the Windows + I keys to go to the settings.
- Under the Settings section, click on the Network and Internet section and then click on Status from the pane.
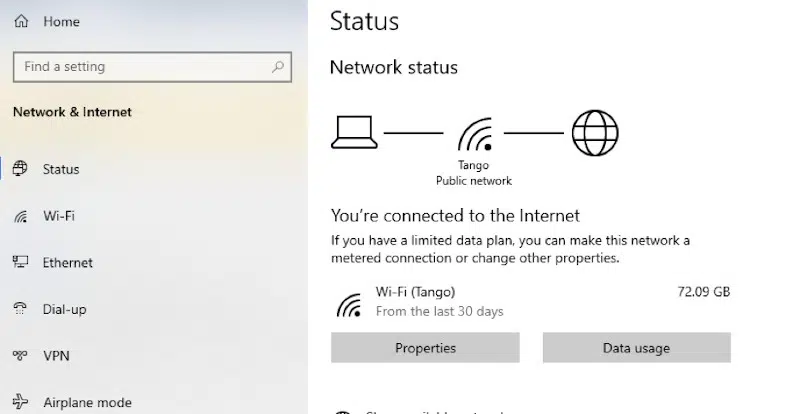
- Click on Network Reset and then at the end of the list, click on the Reset Now button.

- Restart your computer and confirm if the network has been successfully reset.
Solution 8: Resetting Your Network Adapter
There are some instances where the network adapter may have acquired certain incorrect configurations that may prevent it from functioning in the right way. In this step, what we will be doing is reset the network adapter.
Here is how to go about it:
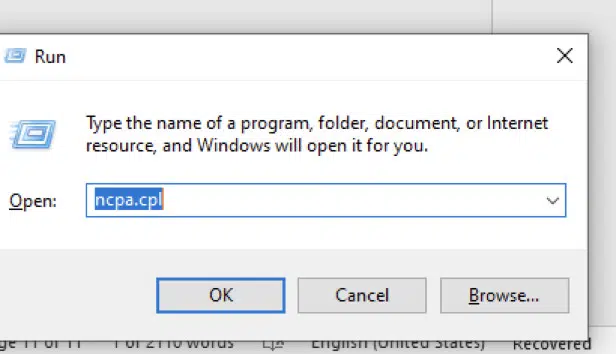
- Press the Windows + R keys and proceed to open the Run prompt.
- Under the Search icon, type ncpa.cpl and then hit the Enter button to open the Network Connections settings.
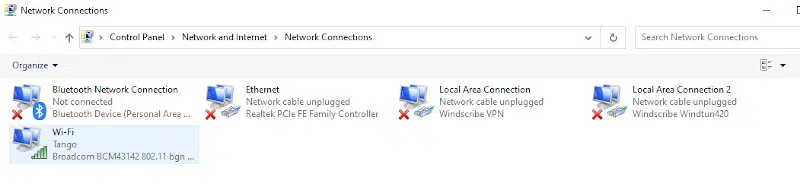
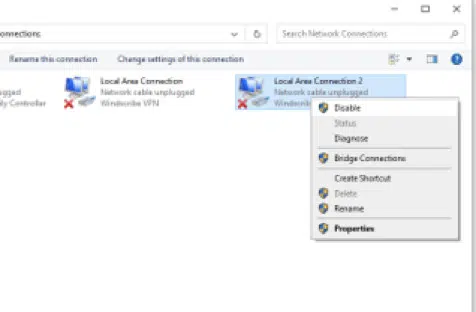
- Under the Network Connections section, right-click on the Network Adapter that it is using and then select Disable.
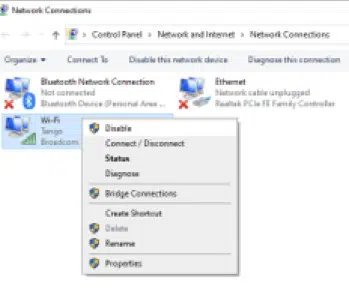
- After a few minutes, right-click on it and then click on the Enable icon.
- Give your computer some time and confirm if the issue has been resolved.
After the scan is complete, try checking if the internet issue is now over.
Solution 9: Enable the Services Required
There are times when some services are responsible for setting up new connections and ensure that all the configurations are operating as they should be. However, you should note that these services can be stopped by a third-party program that is conflicting with the service.
To fix the issue through this method, here is what you need to do:
- Under the Search bar, search Command Prompt.
- Proceed and right-click on the command prompt. Go ahead and run it as an Administrator.
- Proceed and type the following commands to enable the primary configuration services.
sc config Wlansvc start= demand
sc config dot3svc start= demand
sc config Dhcp start= auto- After doing these steps, you should reboot your computer and check if the issue has been resolved.
Solution 10: Set Up a Static IP Address
You can also solve the issue “Windows Could Not Automatically Detect This Network’s Proxy Settings” by using a Static IP address. It will fix the issue because you will be manually configuring the critical settings required to operate effectively.
Here is what you need to do:
- Press the Window + R keys
- Type ncpa.cpl and then click OK.
- Click on your Network Adapters and then disable them. After that, select enable it, and you will be good to go.
Solution 11: Reset all the Adapter and Network Configurations
This is another method you can use to resolve the issue “Windows Could Not Automatically Detect This Network’s Proxy Settings” What happens here is the removal of drivers of network adapters and network configurations completely from Windows 10. That can be done using the Command Prompt.
Here are the steps you need to follow:
- Under the Search icon, type command prompt.
- In the Search bar that pops up, select Run as Administrator.
- Once the Command Prompt is opened, you should type this command and press the Enter key.
netcfg –d- Be patient and wait for the command to execute.
- Once it is has completed, you should proceed and restart your computer and confirm if the issue is still prevalent.
Conclusion
If your computer has an issue to do with Windows Could Not Automatically Detect This Network’s Proxy Settings, feel free to try any of the solutions we have discussed in this article.


