

The following error message might pop up on your computer screen when trying to connect with Wi-Fi: Windows Can’t Communicate With the Device or Resource.
This can be caused by anything from an IPv4 or IPv6 address conflict, a DNS service that is unreachable, running through proxy servers which are used instead of a direct network path. In this article, we will discuss what causes these errors and how they are resolved.
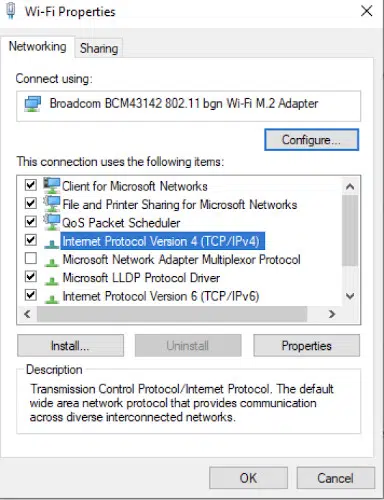
Solution 1: Change the Settings of IPv4 and IPv6
Internet Protocol version 4 (IPv4) is a specific protocol in networking terms like Wi-Fi or Ethernet. IPv4 is incredible because it has the capacity of addressing over 4.3 billion addresses.
On the other hand, the Internet Protocol version 6 (IPv6) is more advanced and its features are upgraded when compared to those of IPv4. The incredible thing about IPv6 is that it has the capability of providing 3.4 x 1038 unique IP addresses.
You should try changing both of these settings on your computer to see if it provides a solution to the problem. This is one of the most certain methods of solving this error and once you try it, the message will disappear.
Here is how you do it:
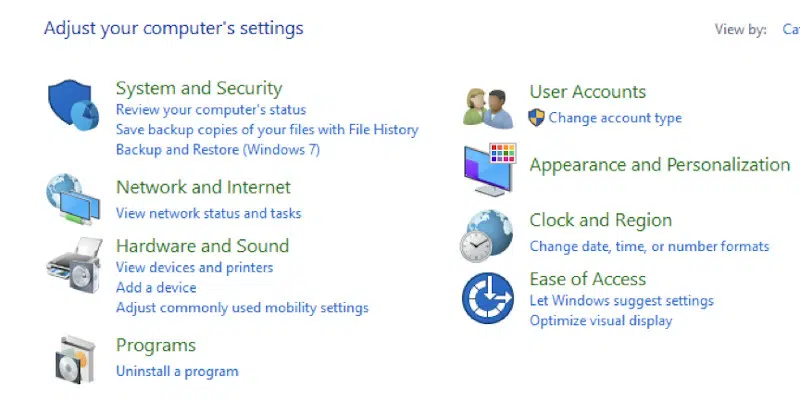
- Press Windows + R keys and then type control panel in the Search box.
- Press the Enter button to continue.
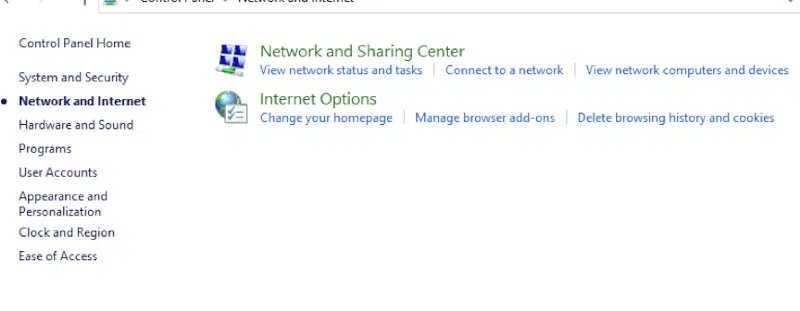
- When you see the Control Panel, click on the subheading that reads Network and Internet.
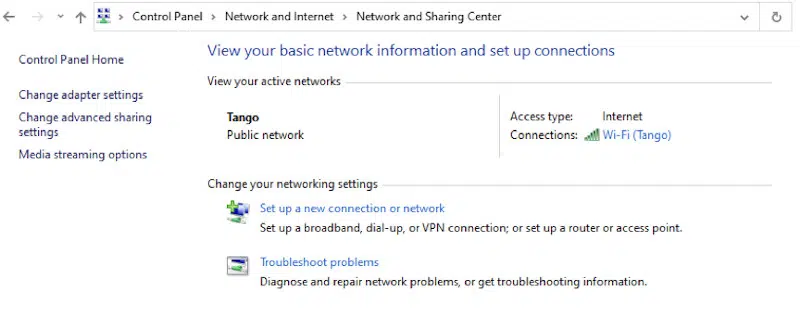
- Then choose Network and Sharing Center from the window that you are redirected to.
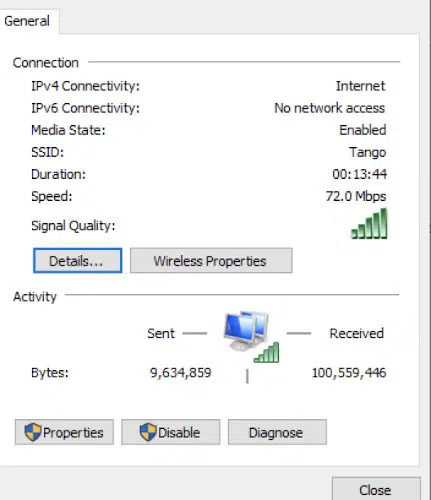
- In this section, you will find the network that you get connected to. Select the network present in front of Connections.
- The next thing you do is select Properties that pop up near the bottom of the small window.
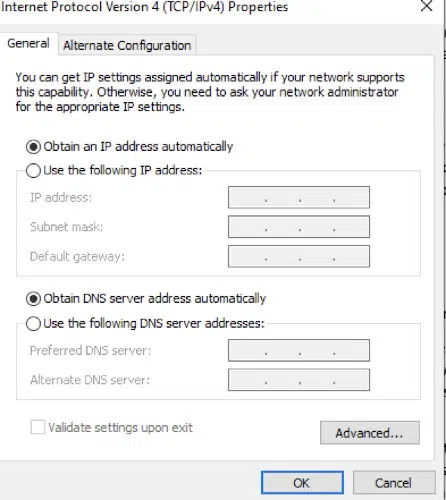
- Double-click on Internet Protocol version 4 (TCP/IPv4). Proceed and set both of the options to Obtain DNS server address automatically and Obtain an IP address automatically.
- You should proceed and click OK and accept to save changes. Go ahead and click on Internet Protocol Version 6 (TCP/IPv6) and do the same things you did in the earlier step.
- Press Ok and agree to save the changes and exit that page. Now try connecting to the Internet and confirm if it has been solved.
Solution 2: Reset the Connection Settings
This method forces your computer to flush its DNS and IP configurations. There is a possibility that either of these settings is either not configured or corrupt just like expected. We can attempt to reset them to see if we will resolve this issue. You need to have Administrator access for this method to work.
Here is how to go about it:
- Press the Windows + R keys and then type command prompt on the Search box that opens up. Right-click on that application and then select Run as administrator.

- In the Command Prompt window, run the following commands:
ipconfig /flushdns
ipconfig /registerdns
ipconfig /release
ipconfig /renew- Close the Command Prompt after executing all the above commands.
- Restart your computer.
- Confirm if the issue has been resolved.
Solution 3: Reset TCP/IP With the NetShell Utility
In case the error is still popping up, your TCP/IP settings may have been corrupted. TCP/IP is one of the core elements needed by the operating system of the Windows program to successfully connect to the internet.
In that situation, if you are connected to the internet physically, or the link is already up and running, you will not have success in sending the packets. What you should do in that case is reset the TCP/IP of your computer and see if the issue will be resolved.
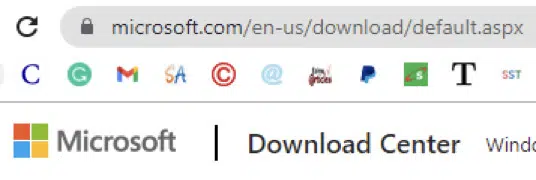
What you need to do is download a tool from Microsoft and then run it on the computer that has the issues. In this case, you will need to have another device that has a stable internet connection.
Here is how to go about it:
- Visit Microsoft’s official website and download the NetShell utility.
- Double-click on the downloaded file and then select Next and go by the instruction displayed on the screen.
Alternatively, you can open the Command Prompt and execute the following command:
netsh int ip resetYou can define any particular path for the log file to be generated by executing the following command:
netsh int ip reset c:\ipresetlog.txtDo not forget to restart your pc after carrying out this operation and then confirm if the problem has been solved.
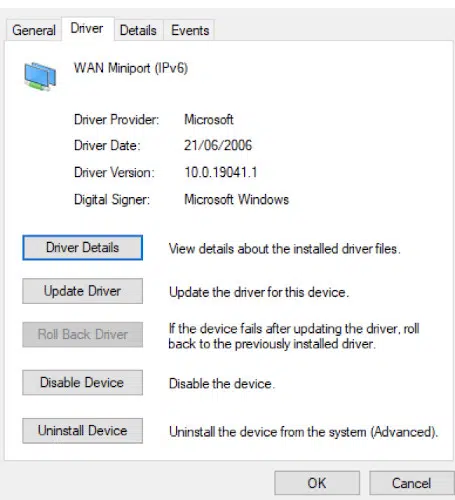
Solution 4: Reset the Drivers of Your Network Device
Sometimes, the issue is brought about by installing the drivers incorrectly. In most cases, Windows automatically update the drivers through the Windows Updates.
There is a possibility that the current driver you have installed on your computer is not compatible with it and that’s what brought this issue. It can be the reason why the error keeps popping up. What you need to do is roll back the drivers and then confirm if the issue has been resolved.
Here is how you can go about it:
- The first thing you need to do is press the Windows + R keys and on the Search icon that pops up, type devmgmt.msc.
- Press the Enter button.
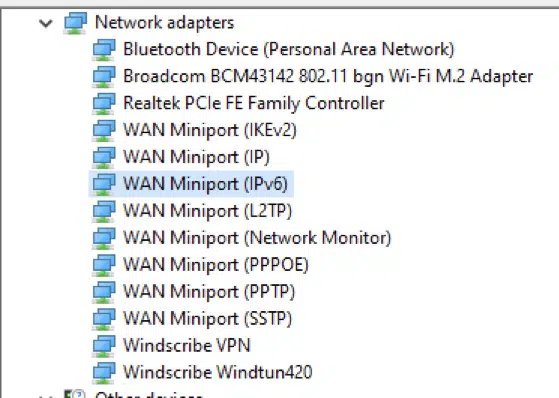
- When you see to the Device Manager, you should expand the Network Adapters and locate your hardware. Proceed and right-click on it and then choose to uninstall it.
There are times when Windows may pop up a UAC confirming all your actions. If that is the case, you should press Yes and proceed.
Once you’ve uninstalled the driver, right-click on the space and then select Scan for hardware changes. What happens next is that Windows will automatically pinpoint the hardware and install the default driver.
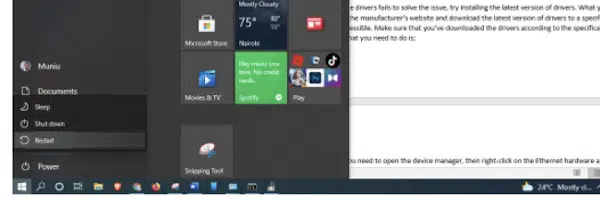
Restart your computer and confirm if the issue has been resolved.
If trying to reset the drivers fails to solve the issue, install the latest version of the drivers. What you should do is go to the manufacturer’s website and download the latest version of drivers to a specific location that is accessible.
Make sure that you’ve downloaded the drivers according to the specifications of your system.
Here is what you need to do:
- Open the Device Manager, then right-click on the Ethernet hardware and choose the option Update driver software.
- Select the option Browse my computer for driver software. Make sure you have browsed the driver you downloaded and then install it. The next thing you need to do is reboot your computer and check if the adapter is working perfectly.
Solution 5: Restart the Router and Modem
Restarting your modem or router is another method that can solve this problem. There is a possibility that your internet router has been saved in the wrong configuration. It can also be an issue to do with the recent settings that may result in this issue.
Restarting your router or modem should be the first thing you do. Make sure you’ve done it manually and confirm if the situation improves.
Here is what you need to do:
- Get your router and hold it in a way that the ports are facing you.
- Look for a button labeled Reset on its back. For routers that don’t have that button, you need to use a thin pin and press inwards towards the hole that is labeled Reset.
- Having done that, connect the computer to the Wi-Fi network. You should launch your application again and confirm if the issue has been resolved.
Solution 6: Set Google’s DNS
Another method you can try to solve this issue is trying changing your DNS manually. For this case, we will use Google’s DNS and confirm if the problem with the internet connection gets fixed. In case the issue has not been resolved, you can try reverting the changes using the same method.
You can do this through the following method:
- Press the Windows + R keys and then type control panel in the Search box.
- Press the Enter button.
- When you get to the Control Panel, click on the subheading that reads Network and Internet.

- Proceed and double-click on the icon Internet Protocol Version 4 (TCP/IPv4) and make sure you’ve saved the changes on the DNS server.
- Proceed and click on Use the following DNS server addresses. That makes the dialogue box to become editable. You should set the values in this format:
Preferred DNS server: 8.8.8.8
Alternate DNS server: 8.8.4.4
- The next thing you need to do is press OK and then save changes and exit this page.
- You should reboot your computer and confirm if the issue is resolved.
Solution 6: Scan for Malware
In case all the above methods have failed to solve the issue of network connection, there could be a possibility that your computer has been affected by malware.
If that is the case, make sure you’ve cleaned your system thoroughly. Scan your computer with windows defender.
Here are a few things you need to do:
- Start by launching settings.
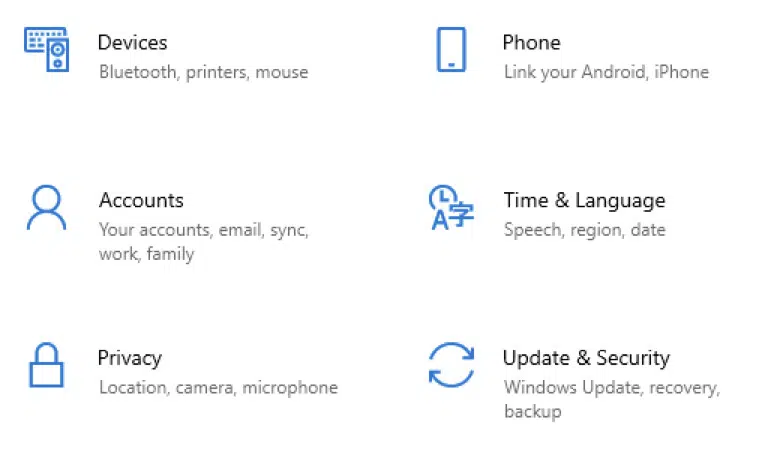
- Proceed and select Update & Security.
- Proceed to the Windows Security section and click on Virus & threat protection.
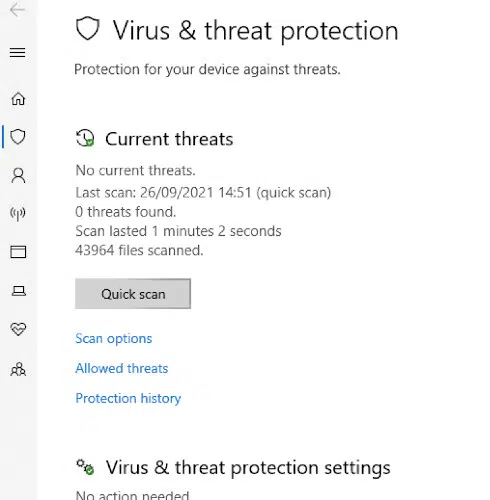
- Once you get to this section, click on Run a new advanced scan.
- Proceed and select Full scan and then press the Scan now button.
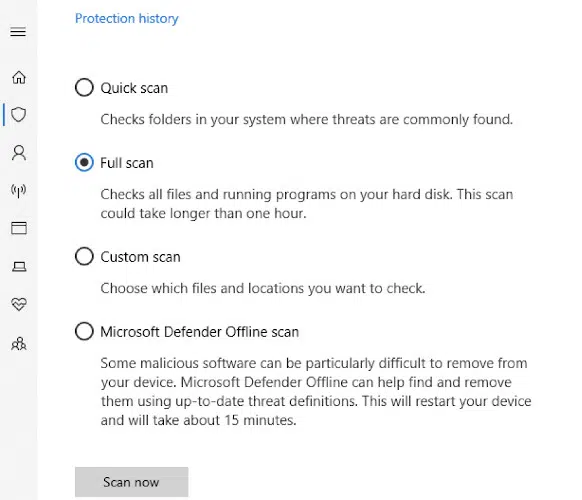
You can run custom, full, or an offline scan using Windows Defender. After doing all that, you should restart your computer and check if the issue has been resolved.
Frequently Asked Questions
How Do I Fix a DNS Server Error?
If the DNS server is not responding, you need to do the following:
- Switch to a different browser.
- Make sure you start your computer in Safe Mode.
- You need to switch off your anti-virus software temporarily.
- Dsable all the secondary connections.
- Proceed and disable the Windows Peer-to-Peer feature.
- Restart the router.
All the above methods are different ways to fix the issue of the DNS server not responding.
What Do “Windows Can’t Communicate With the Device or Resource” Mean?
This error pops up when the computer fails to link up to the main server DNS that is set by the Internet Service Provider (ISP). The error pops up in the network diagnostics that one runs when the computer is unable to connect to the Wi-Fi.
What Causes DNS Error?
Something we need to be clear on is that the DNS errors occur primarily because the computer is unable to connect to a specific IP address. It signals that you probably have lost network or total internet access.
DNS is an acronym for Domain Name System. In a nutshell, DNS means that the web domain name is translated to an IP and vice versa.
How to Flush DNS Cache?
The process of clearing DNS cache varies depending on the operating system on your computer.
Follow the steps below to flush the DNS cache on Windows 10. The process also applies to Windows 8.1
- Click on the Start button.
- Go to Command Prompt.
- A popup asking you to allow a Command Prompt to make changes to the computer may appear. Click Yes, if you do.
- At this time, you may be required an administrative login, contact your System Administrator to continue.
- Type ipconfig /flushdns in the Command Prompt.
- Press Enter.
- A confirmation message showing that DNS resolver cache was successfully done will appear.
Does Flushing DNS Speed up the Internet?
There is a possibility that clearing DNS may bring some improvements but not much. It clears out obsolete entries if it has stayed for long without being done and, caching is hindering something. However, clearing cache slightly lowers speed as it needs new DNS lookups for every resource.
Why Flush a DNS Cache?
It is important to clear a DNS cache since it may have outdated information. Clearing the browser history will not help since the DNS cache will still have the old information. Hence the need to flush the server to get an improved result.
Clearing cache retains your privacy. DNS cache does not have the same information stored in JavaScript or cookies but retains records of addresses visited recently.
If someone gets access to your computer, there will be no privacy. For security reasons, it’s good to clear cache to avoid cybercriminals from changing IP addresses.
Conclusion
If your computer shows the error Windows can’t communicate with device or resource, you can try any of the above methods to fix it. It is a problem that can be fixed.


