

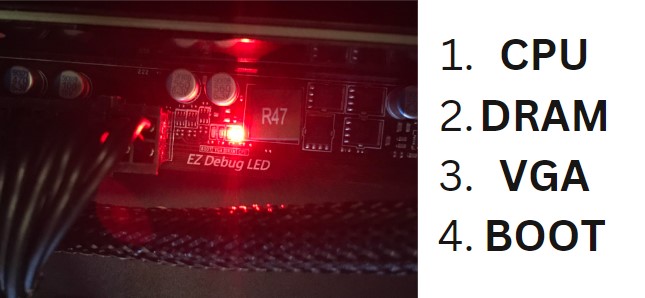
Any PC user can encounter a problem with their BIOS settings. The EZ Debug LED is a feature in MSI motherboards that can help you diagnose the problem. If a component fails, an LED will appear on the board to indicate which component needs to be replaced.
This issue can be caused by many problems, such as failed overclocking, incorrect BIOS settings, or damaged hardware. If you’re experiencing this issue, you must take the proper steps to fix it. This will prevent you from reinstalling your OS and losing your data.
Fortunately, fixing EZ Debug LED errors is relatively straightforward. Make sure you follow the steps and keep all your hardware in check. If you are unsure what to do, this article can help you understand the error and fix the problem.
What Does EZ Debug LED Mean?
EZ Debug LED is a feature available on many recent motherboards. It displays a two-digit code that provides information about the system’s current status. The code is displayed on the board’s LED display.
EZ Debug LED can help diagnose common problems or hardware issues with your PC. If your PC is having trouble booting up or isn’t performing as well as it should be, EZ Debug LED can help you find the cause.

Once you know what the code is, you can use it to troubleshoot and diagnose any potential problems. Different motherboards may have different codes for the same issue, so it’s important to check your motherboard manual or manufacturer’s website for a complete list of codes and their meanings.
With EZ Debug LED, you can easily identify common problems with your PC and take the necessary steps to fix them. It can save you time, money, and frustration. So if your PC is having trouble booting up or running correctly, look at your motherboard’s EZ Debug LED and see if you can get it running again.
EZ Debug LED Codes
EZ Debug LED codes are divided into four categories: CPU, VGA, DRAM, and BOOT. Each of these categories has its two-digit code, and each code represents an issue that may be causing your PC not to function properly.
- CPU: This code indicates a potential problem with your CPU. It could be due to an incorrect CPU voltage setting, a defective CPU fan, or a faulty CPU cooler.
- VGA: This code refers to any issues related to your graphics card. It may be due to an incompatible GPU driver, a loose connection between the GPU and the motherboard, or a faulty GPU.
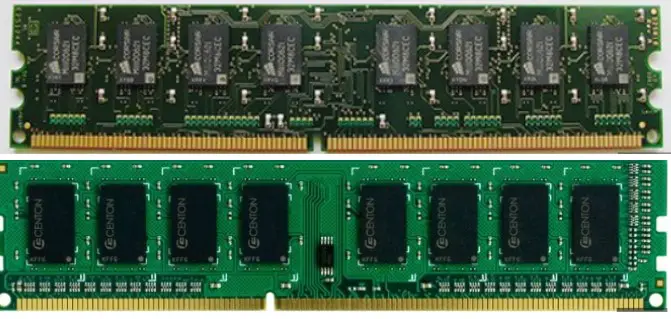
- DRAM: This code indicates any issues related to your memory modules. It could be due to an unsupported RAM type, faulty RAM modules, or incorrect memory timings.
- BOOT: This code indicates any issues related to your system’s boot process. It could be due to an incorrect BIOS setting, a broken hard drive connection, or a damaged operating system file.
By understanding what the codes mean, you can easily pinpoint the source of any hardware issues and take steps to fix them. EZ Debug LED can save you time and money, so make sure to check it first if your PC isn’t working properly.
How To Fix EZ Debug LED?
If you are having issues with your EZ Debug LED, there are several methods that you can use to try and identify and repair the issue.
1. CPU
You should start your investigation by checking the CPU. Ensure it is properly seated in its socket and securely connected to the motherboard. You should also check the CPU heat sink and fan are securely installed, as this could cause the EZ Debug LED to light up if not properly seated. This could be due to poor contact with the processor or a damaged fan.
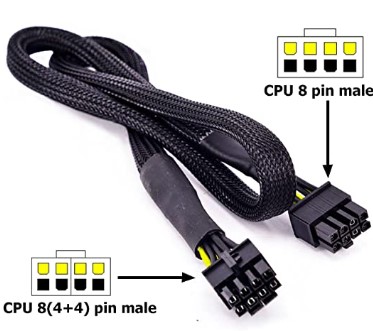
The 8 or 4-pin CPU power connector should also be checked to ensure it is properly connected. If the connection is loose or not seated correctly, this could cause issues with the CPU and trigger the EZ Debug LED. Also, you need to check the possibility of any bent or broken pin in the CPU socket. If you find two pins bent, you can use a needle or tweezers to straighten them.
2. DRAM
Any obstruction of the DRAM is a possible cause for an EZ Debug LED. To fix this, ensure that all your RAM modules are firmly inserted into the RAM slots and that no dust, dirt, or other obstructions are present. If the issue persists, try a different set of DRAM sticks on your PC to check if the issue is with one of the RAM modules.
If this resolves the issue, the faulty RAM module needs to be replaced. You can also clear the CMOS to reset any DRAM configuration settings that may have caused the issue. Finally, ensure that your BIOS is updated with the latest version to ensure that all DRAM settings are compatible with your system.
All these steps should help alleviate any potential DRAM-related issues causing the EZ Debug LED to light up. Suppose these solutions do not resolve your issue. In that case, it is recommended to seek professional help from a PC technician who can identify and fix the underlying cause of your EZ Debug LED.
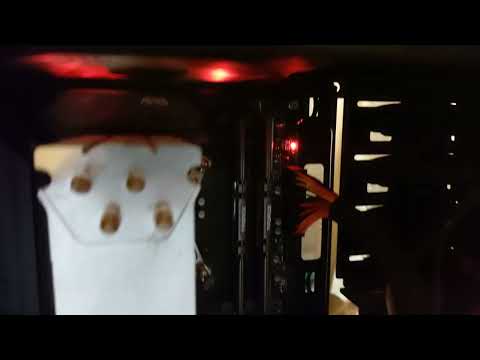
3. VGA
If your EZ Debug LED displays errors, a simple switch in the VGA cable could very well be the answer. Ensure that it’s securely connected to both ends of the device and if so, try switching out its current cable for one better suited to support higher-resolution monitors.
If this doesn’t resolve the issue, opt for an even more reliable alternative with improved quality.
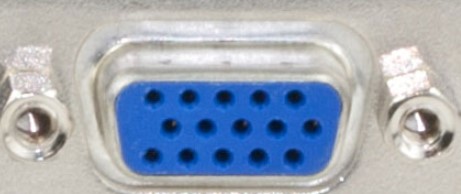
If you use the graphics card in a laptop, check if the connections are secure and firmly connected. Using an external display, use the appropriate display cable and check the connections. The PCIe slot might also be loose, so check that as well.
4. BOOT
A loose connection on your storage devices can be why a debug LED appears on your motherboard. To check this:
- Open the computer case and take out all drives, including RAM and other peripheral devices.
- Plug them back in and secure them with screws, so they’re correctly connected. If you have a SATA power cable, ensure it’s also connected to the drive.
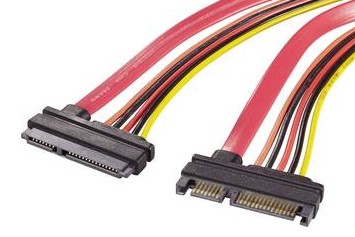
- Once this is done, boot up your PC and check if the debug LED is still on.
If not, then you know that the problem was with your storage devices.
5. Other Issues
If the above solutions do not help, check if the power supply and all its cables are firmly connected to your motherboard. Ensure all switches on the case and motherboard are in the correct position. Also, ensure that all connectors from the power supply and the case to the motherboard are connected correctly.
You can also try to reset the BIOS by pressing the reset button on the motherboard or simply unplugging and replugging the power cable.
If none of these solutions work, you may need to take your PC to a technician and have them diagnose the issue. A technician can identify any underlying issues that cannot be fixed with basic troubleshooting. They can offer other solutions, such as replacing faulty components or upgrading the system.
Related: MSI vs Alienware: Which is the Best Gaming Laptop Brand?
Conclusion
When you encounter an EZ Debug LED light on your motherboard, it can feel like a daunting task to figure out the root of the problem. Fortunately, by following the steps outlined in this article, you can quickly identify and fix the problem. Follow each step carefully, checking the system components and ending with a full system reboot.
If all else fails, consult your motherboard’s manual for assistance or contact customer support. With a few simple steps, you can get your system running again in no time!
Frequently Asked Questions
Why Is My Boot LED On?
A solid LED indicates that the power to your boot device is present. If your boot LED is on, check for any external power sources connected to the device, such as an external hard drive or a USB thumb drive.
Ensure that your computer is powered on and connected to the same power source as your boot device. If the LED remains on and you are still having trouble starting up, it may be a sign of a hardware failure or system malfunction. Contact a technician for further assistance.
What Can I Do If My Boot Device Is Not Detected?
You may need to reinstall your operating system if your boot device is not detected. This could mean a faulty component in your computer or that the data on your hard drive has become corrupted. Before doing so, you should try to troubleshoot the issue by connecting an external device, such as a USB flash drive, with a live version of the operating system you are trying to install.
This will allow you to see if your computer recognizes the device. If the USB drive is recognized, you can try to boot from it and install a fresh copy of your operating system.
What Is The BIOS Key For MSI?
The BIOS key for MSI computers is usually the DEL or F2 key. To enter the BIOS setup, you must press and hold these keys on your keyboard while the system is booting up. Once you enter the BIOS setup, you can configure the system time and date, boot order, hardware settings, etc.
Once you have made your desired changes in the BIOS setup, press F10 to save and exit. Your system will then boot up with the new settings.
If the DEL or F2 key does not work, it may be because the BIOS is password protected. To access the BIOS setup, you will need to enter the correct password. If you do not know the current password, consult your computer’s user manual or contact MSI customer support for assistance.
Where Is The Fn Key On MSI Keyboard?
The Fn key is typically found on the lower left side of the MSI keyboard, just to the right of the Ctrl key. It may also be located on the right side of some keyboards, usually next to the Alt and Ctrl keys. On some laptops, the Fn key may be part of the Function keys located at the top of the keyboard.
Some MSI keyboards may also feature an Fn Lock key, which allows you to toggle between using the Fn key as its intended purpose and using it as a normal function key. To use the Fn Lock feature, press and hold the Fn key for a few seconds until the Fn Lock indicator appears on the screen.
You can then toggle the Fn Lock key to enable or disable its functionality.
How Do I Enable Fn On MSI?
Enabling the Fn key on an MSI laptop is as easy as pressing a few keys. First, press and hold down the Fn key next to your spacebar’s left-hand side. At the same time, holding the Fn key, press and hold down the appropriate function key on the top row of keys (F1, F2, F3, etc.).
You should then see a notification on the screen prompting you to turn on or turn off the Fn key. Select whichever option you desire, and that’s it! The Fn key is now enabled or disabled, depending on your selection.
How Do I Get To The Hidden BIOS Menu?
It is possible to access the hidden BIOS menu on most computers and laptops by pressing a certain key or combination of keys during the boot process. Many computers will display which key needs to be pressed on the initial boot screen, usually by pressing the “F2” or “Delete” key. If this is not displayed, it is usually the “F2” or “Delete” key that will open the BIOS menu.
Once the BIOS menu opens, you can access and modify the system settings, such as enabling or disabling certain hardware, setting boot device priority, and changing the system time. Note that any changes made in the BIOS menu may harm your computer’s performance, so it is important to be sure of what you are changing before making any modifications.
Not all BIOS menus will have the same options, so be sure to take the time to familiarize yourself with your system’s setup before making any changes.
Once you have finished making changes to the BIOS, it is important to remember to save the changes before exiting the menu. This can usually be done by pressing the “F10” key. If you forget to save your changes, the BIOS will not apply them, and you will need to repeat the process.
MSI Hidden BIOS Settings?
MSI motherboards have a variety of hidden BIOS settings that allow you to customize your system’s performance and stability. Some of these settings can be accessed by pressing the “Delete” key during system startup. Other settings, like overclocking options and power management, are only available through MSI’s UEFI BIOS interface.
To access this UEFI BIOS interface, press the “F2” key during system startup. You will then see a blue background with several tabs across the top. These tabs contain various categories of settings related to system performance and stability.


