

Are you facing issues connecting to the internet? Did you ever face an error like “Windows can’t connect to this network”? If yes, you might be clueless about the problem.
In this quick guide, we’ll show you some ways to fix the “Windows can’t connect to this network” error so you can get back to enjoying the internet. Keep reading to learn more!
Many Windows users may encounter a “Windows can’t connect to this network” error when connecting to a wireless network. Incorrect network settings usually cause this error.
The “Windows 10 can’t connect to this network” error is an error that can prevent a user from connecting to a network. This error can occur on Wi-Fi networks, wired networks, or mobile broadband networks.
What Cause of This “Windows Can’t Connect To This Network” Error?
If you’ve ever received the “Windows can’t connect to this network” error, you’re not alone. This common error can be caused by some factors, including:
- The wireless network is out of range.
- There’s a problem with your internet service provider (ISP).
- There’s a problem with your router or modem.
- You’re using the wrong type of security for your wireless network.
You may find many online ways to help you fix this issue, but In this blog post, We will share with you some best and easy methods.
How to Fix Windows 10 Can’t Connect to this Network?
Follow the instructions below to fix the Windows 10 Can’t Connect to this Network error.
Method 1: Remove Your PC Network
If you’ve been having trouble connecting to a certain network on your Windows PC, the solution may be as simple as removing the network from your list of saved networks.
Here’s a step-by-step guide on how to do that:
1. Open the Control Panel and go to Network and Sharing Center.
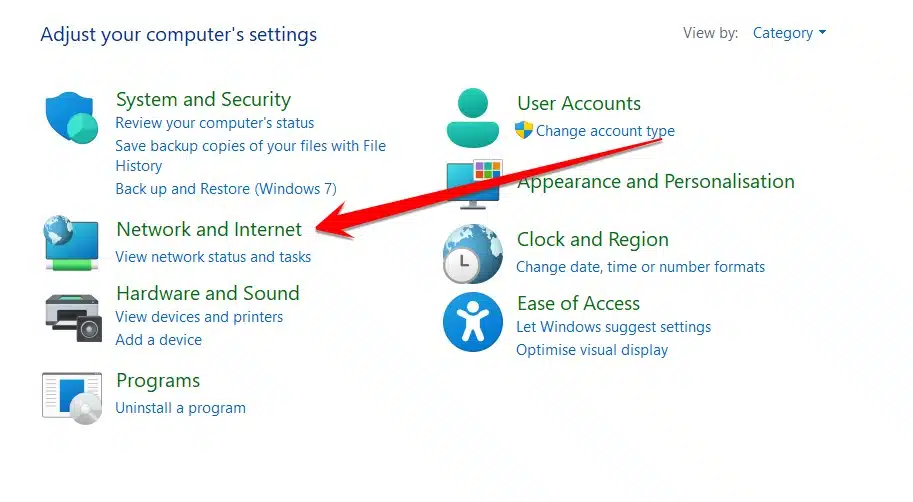
2. Click on View network status and tasks.

3. In this window, you see an option “Ethernet” you need to click on it.
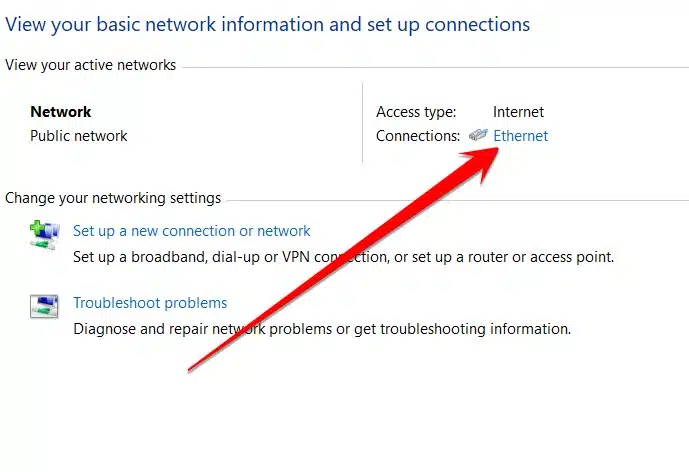
4. In the popup window, you see a button called “Disable” click on it and disable your internet connection to your PC.

If you still can’t connect, try restarting your PC and see if that does the trick. If not, there may be something wrong with your connection or your computer’s settings.
Related: Fix: High CPU Usage By .NET Runtime Optimization Service
Method 2: Uninstall Network Adapter Driver
If you’re getting the “Windows can’t connect to this network” error, it might be because your network adapter driver is outdated. To fix the problem, try uninstalling and reinstalling the driver.
Here’s how to do it:
1. Press the Windows+X button to open Windows Device Manager.

2. In Device Manager, you need to locate the network adapter driver you want to uninstall, right-click it, and then click Uninstall.

3. Right-click on the Network Adaptor driver, and an options list appears. In the following list, you need to uninstall the Network Adapter and click Yes to confirm that you want to uninstall the network driver.

4. In the last step, you need to follow the instructions on your screen to complete the uninstall process.
Method 3: Reset Your PC Network
If you’re having trouble connecting to a network and you see an error message that says, “Windows can’t connect to this network,” it might be because your network’s security settings are preventing your PC from connecting. The best way to fix this problem is to reset your PC network.
To reset your network, you need to follow these steps:
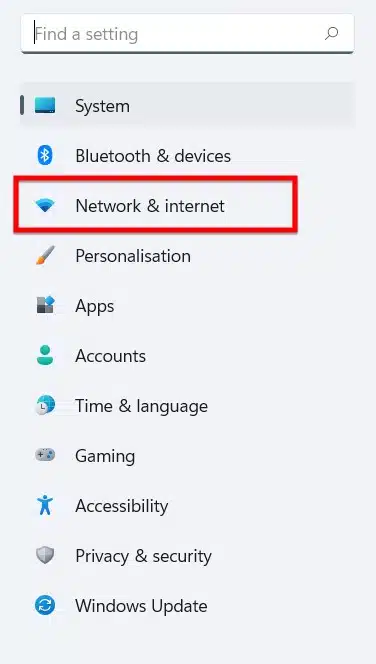
1. Press the Windows+I button to open the windows PC setting.

2. Click on Network & Internet option.
3. You need to click on the “Advanced network settings” option in the Network and Internet section.
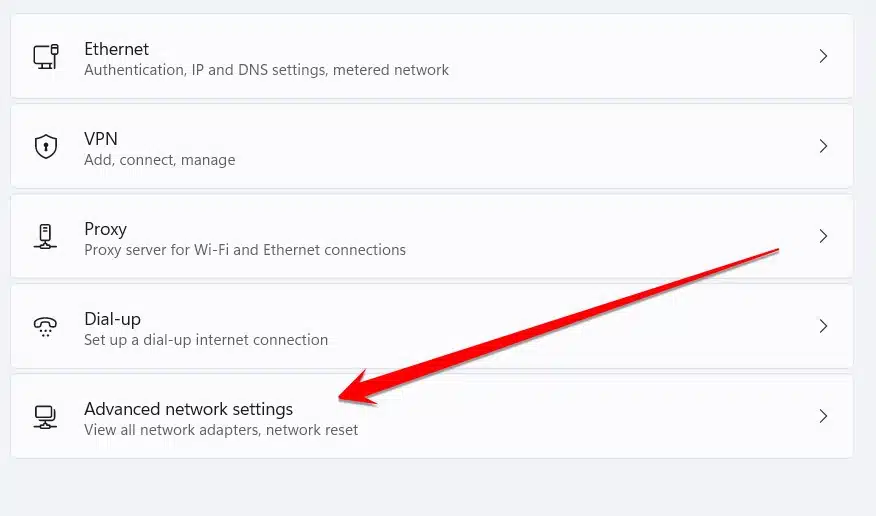
4. After entering this window, you will see an option, “Network reset” you need to click on this option.

In the last step, you need to click on the “Reset now” button to reset your PC network.

Once it’s done, try connecting to the network again and see if it works.
Method 4: Run Network Troubleshooter
If you’ve been having trouble connecting to a wireless network, running the network troubleshooter in Windows may be able to help. The network troubleshooter can automatically fix some common problems with your network connection, and it might be able to help you connect to the Internet or fix other errors.
To run the network troubleshooter, you need to follow these steps:
1. Press the Windows+I button to open the PC setting.

2. In the second step, click on the System section from the right of the given option list.

3. In the system section, scroll down and select Troubleshoot option.

4. Now click on the Other Trouble-shooters option.
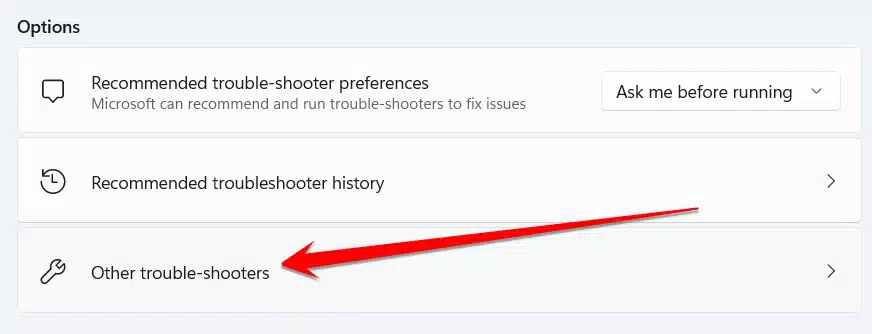
5. Here, you see the first option, Internet connection. You need to click on the Run button to start the Internet connection troubleshooting option and fix this issue.

The Network Troubleshooter will automatically run tests and try to fix any issues it finds. If it’s able to fix the problem, great! If not, you’ll at least have more information about what might be wrong.
Frequently Asked Questions
My Laptop Won’t Connect To WiFi, But Other Devices Will
If you’ve been having trouble connecting your laptop to your home wifi, but other devices seem to be working just fine, don’t despair. There are a few potential reasons why this might happen, and fortunately, they’re all relatively easy to fix.
One possibility is that your laptop’s wifi adapter is turned off. This is easily remedied – go into your computer’s settings and ensure the adapter is turned on.
Another possibility is that something is blocking your computer from connecting to the Wi-Fi signal. This could be anything from a physical object like a bookcase or window to an electronic device like a baby monitor. If you suspect that there might be something blocking the signal, try moving your laptop closer to the router.
Finally, there may be an issue with the router itself.
What Happens If I Uninstall Network Adapter?
If you’re considering uninstalling your network adapter, you should know a few things. For starters, uninstalling the adapter will disable your ability to connect to the internet. It may also cause problems with your computer’s ability to connect to other devices on your network.
So, what exactly happens if you uninstall your network adapter?
Here’s a look at what you can expect:
- Your computer will no longer be able to connect to the internet. This means you won’t be able to browse the web, check email, or do anything else that requires an internet connection.
- You may also have problems connecting to other devices on your network. For example, if you have a home network, you won’t be able to access files on other computers or stream media from those computers.
How To Show Hidden Network Adapters In Windows 10?
If you’re using Windows 10 and want to see all available network adapters, follow these steps:
- Right-click the Start button and select Device Manager.
- In Device Manager, go to View > Show hidden devices.
- This will show all devices, including those that are disabled or uninstalled. To find your network adapters, expand the Network Adapters section.
- If you don’t see your network adapters here, they may be disabled. To enable them, right-click each adapter and select Enable device.
Why Can’t My Laptop Connect To WiFi But My Phone Can?
It’s one of the most frustrating things that can happen – you’re trying to get some work done on your laptop, but for some reason, it just won’t connect to the WiFi. Meanwhile, your phone has no problem connecting to the same WiFi network.
So what’s going on?
There are a few possible explanations for this phenomenon. One possibility is that there’s something wrong with your laptop’s WiFi antenna or its drivers. Another possibility is that the WiFi network itself is having some issues. Or, it could be that your phone is better at connecting to WiFi than your laptop.
Whatever the reason, it’s frustrating when you can’t get your laptop to connect to WiFi while your phone has no problem. But fortunately, there are a few things you can try to troubleshoot the issue.
Why Won’t My Work Laptop Connect To My Home Wi-Fi?
If you’re working from home and your work laptop won’t connect to your home Wi-Fi, there could be a few reasons.
Here are a few potential solutions to try:
- First, check to see if your home Wi-Fi is working by trying to connect to another device, like your phone or another laptop. The problem may be with your router or modem if that doesn’t work. Try restarting both of those devices.
- If you’re still having trouble connecting, your work laptop may only be configured to connect to certain networks. You’ll need to check with your IT department to see if they can help you change the settings on your laptop.
Hopefully, one of these solutions will help you get connected so you can continue working from home!
How To Connect My Work Laptop To My Home WiFi?
If you work from home, chances are you’ve had to deal with the headache of connecting your work laptop to your home WiFi.
Here are a few tips to make the process a little easier:
- Check with your IT department to see if they have specific instructions for connecting to a home network. They may have a VPN or other security measure in place that you’ll need to follow.
- If you’re not sure of your home WiFi password, ask a family member or neighbor for it. It’s always good to have a backup in case you forget it.
- Once you have your password, open up the WiFi settings on your laptop and search for available networks. Select your home network and enter the password when prompted.
- If you still have trouble connecting, try restarting your router and laptop.
Can A Network Adapter Go Bad?
A network adapter is the part of a computer that connects it to a network. If it stops working, it can cause all sorts of problems.
Here’s what you need to know about troubleshooting a bad network adapter:
- If your computer isn’t connecting to the internet or having other networking problems, it could be due to a bad network adapter. This is a relatively common problem, and there are a few things you can do to try and fix it.
- First, ensure the network adapter is properly plugged into the computer and the router or modem. If it’s loose, tighten the connection. If that doesn’t work, try unplugging and replugging the network cable.
If those basic steps don’t work, you may need to restart your computer or reset your router.
How Long Do Network Adapters Last?
Network adapters are one of the most commonly used technology in modern-day society. They are utilized in everything from linking computers to connecting individuals to the internet. Despite their importance, many people are unaware of how long these devices last.
The lifespan of a network adapter varies depending on the make and model. However, most adapters will last between two and five years with proper care. After this time, the device may experience problems such as decreased performance or intermittent connection issues.
If you suspect your network adapter is nearing the end of its life, you can do a few things to extend its usefulness. First, try updating the drivers. This can often improve performance and fix minor bugs. If this doesn’t help, you may need to purchase a new adapter.
Conclusion
I hope the methods mentioned in this article can help you easily solve the “Windows Can’t Connect To This Network” Error by following the steps mentioned in the given methods. If you like this article so, please share it with your friends on social media platforms.
Thanks for reading this article, and also give your best opinion about this blog post below in the comments.


