
This message is an alarm indicating that the audio service in your Windows 10 has stopped and cannot be started automatically. The majority of Windows users have experienced and continue to be affected by different issues in a way that the sound icon gets the red X sign on it meaning it is inactive.
If you try placing the mouse pointer on the sound icon, a message is displayed that indicates: The Audio Service is not running.
This issue is most prevalent in Windows 10 but other versions of Windows get affected as well. The good thing is that almost every user whose Windows have been affected can play audio successfully by connecting headphones/speakers even when there is a red X on the sound icon on their taskbar and when their Windows Audio service is not running.
The root cause of this issue in almost all cases is the Windows Audio service or its other direct dependencies. It can stop spontaneously for some reason or fail to start automatically the moment you boot your computer.
That has also been known to trigger the Audio Service not responding Error. For most users, getting around this problem is easy because all they need to do is reboot their computer. What one needs to note is that that is not a permanent solution to this problem. Discussed below are some of the methods you can use to fix this issue and get a lasting solution.
Method 1: Increase or Decrease the Volume of Your Computer
You can try fixing this issue by using the simplest means possible. Adjusting the volume of your computer by some slight margins can be of great help. It is a method that has solved the issue for many people.
To do this, you need to:
- Select the Sound icon you will find on the taskbar that has the X sign on it. Once you do that, you’ll get to see a volume slider on the screen and you’ll be able to alter the volume of your computer.
- The next thing you should do is increase or decrease the volume of your computer using the slider that appears even if you only do that by the slightest margins.
- Once you’ve done that, it should immediately eliminate the red X on the sound icon that you’ll find on the taskbar and the error message should ultimately disappear.
Method 2: Restart the Windows Audio Service and All of its Dependencies
You can also get fix this issue by restarting the Windows Audio service together with some other two or three dependencies. You need to make sure that all of these services are set in a way that they will start automatically the moment your computer boots up.
To do that, here is what we need to do:
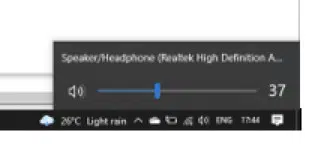
- Press the Windows + R button and then type services.msc in the Run dialog box that pops up.
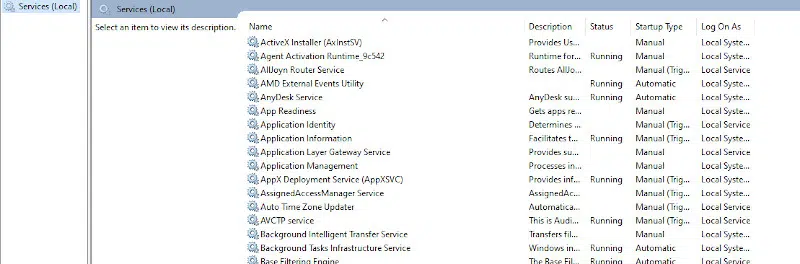
- Locate and double-click on the following services while making sure you are setting their Startup type to Automatic.
- Right-click on each of these services and try restarting them in their resulting context menus.
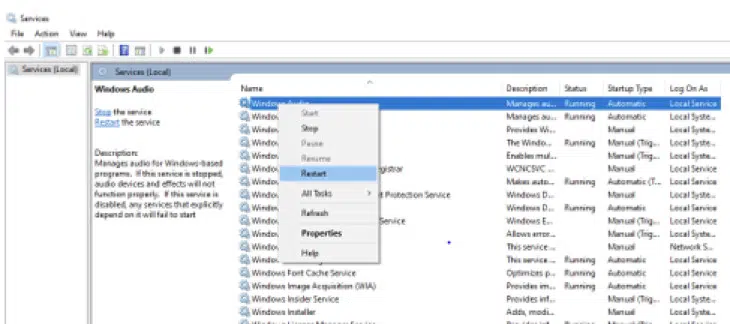
Once each of these services has been restarted successfully, the sound issue should be fixed once and for all. You should no longer see the “The audio service is not running” message.
Method 3: Change the Log On Settings
There are some cases where the services may be allowed to log to a specific account on your computer but may not be configured to log on for a given user account. What you need to do is change the Log On Settings.
An important thing to note is that if the issue is with your notebook/laptop, you should try using the Restore Repair tool that can will scan the repositories and then replace all the missing or corrupt files. This method works in most cases especially if the issue has been brought about by a corrupt system.
To solve this issue, here is what you need to do:
- Press the Windows + R button to open up the Command Prompt.
- The next thing you should do is type services.msc and then press Enter.
- Navigate down and then right-click on the Windows Audio service.
- Proceed and click on the Logon tab and then click on the Local System Account option instead of the This Account option.
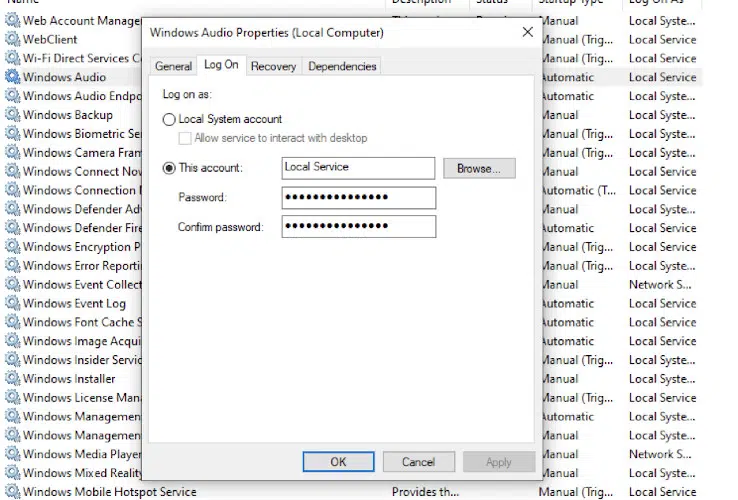
- Confirm if the issue persists.
- If it is still prevalent, you can check the This Account option and then click on Local service in the text box.
- Once you have done that, you can type the password of your preference and then confirm the same.
- You should then click on the Apply option and then click Ok.
Having done all that, the issue should be fixed once and for all.
Method 4: Scan for Changes
In some other cases, the sound drivers may have gained some corrupt configurations or files that may be causing this glitch while at the same time preventing effective communication between the hardware and the driver.
At this point, we will try uninstalling and installing the driver from the Device Manager.
To do that, follow these steps:
- Press the Windows + R buttons to open the Command Prompt.
- On the Command Prompt, type devmgmt.msc and then press Enter.
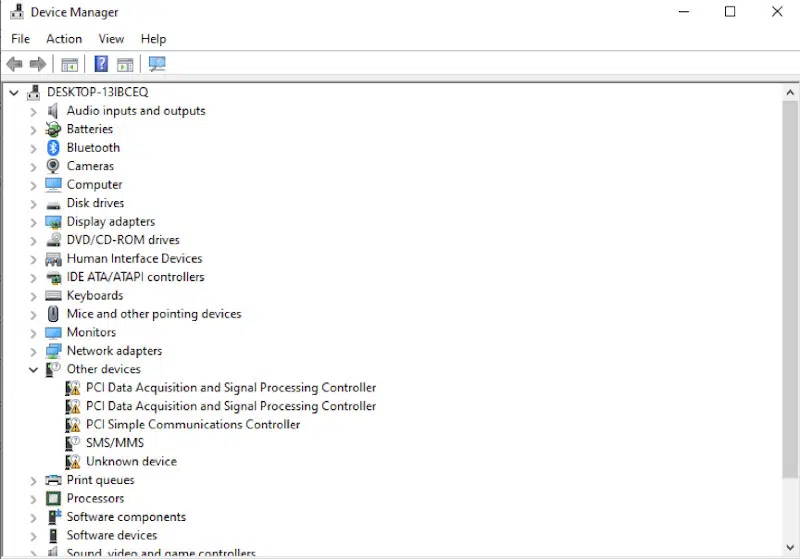
- Once you get to the Device Manager, expand the Sound, video and game controllers option.
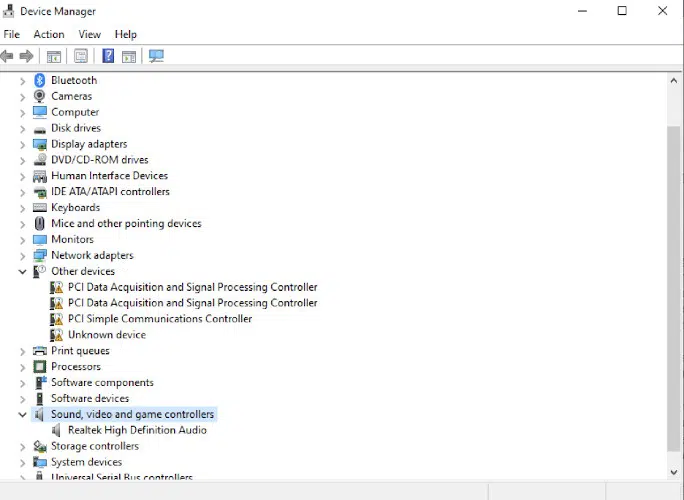
- Right-click on the driver that you are using and then select the Uninstall option.
- Once the driver has completed uninstalling, you should click on the Scan for hardware changes option and the Device Manager will reinstall the driver automatically.
- After that, you should confirm if the issue remains persistent.
- If it is still prevalent, what you should do is click on the Properties option.
- Proceed and click on the Driver Details tab and then go ahead and click on the Rollback Driver option.
- Confirm if doing that fixes the issue. In case it doesn’t, you should repeat all the steps discussed above and then select the Update Driver option.
Method 5: Troubleshoot the Audio System on Your Computer
There is a possibility that the configurations of your Audio System have been messed up by the alterations made. In most cases, this can occur after you have installed a foreign application on your Windows 10. What you need to do is troubleshoot the Audio System.
Here is what you should do:
- Press the Windows + I buttons to open the settings of your computer.
- Select the Update & Security button and then select Troubleshoot from the left side of the pane.
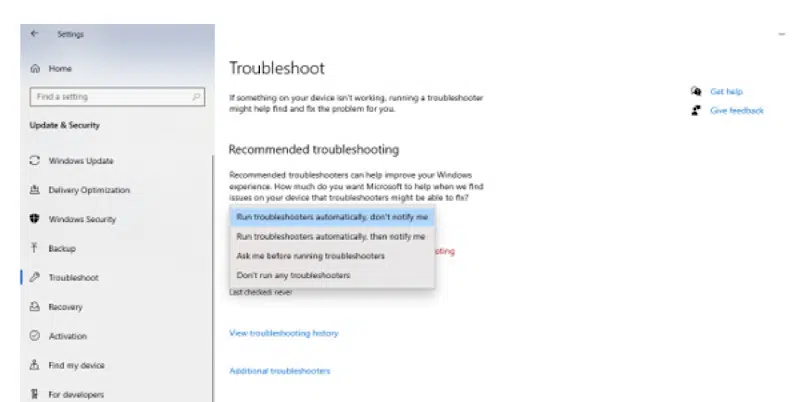
- Select the icon Playing Audio that you will find on the Troubleshoot window and then proceed to select the Run the Troubleshooter option.
- Proceed and confirm if the issue persists after you have run the Troubleshooter.
Method 6: Change the Local Account Configurations
There are instances where the issue may be triggered if you have had some problems with some local account configurations. This method involves running some commands.
Here is what you need to do:
- Press the Windows + R buttons to open up the Run command.
- The next thing you need to do is type cmd and then press Shift + Ctrl + Enter to gain Administrative privileges.
- In the Command Prompt, type these commands in chronological order and press Enter after each one of them to execute them.
net localgroup Administrators /add networkservice
net localgroup Administrators /add localservice
SC config Audiosrv start= auto
REG ADD "HKLM\SYSTEM\CurrentControlSet\Services\Audiosrv" /V start /T REG_DWORD /D 2 /F
secedit /configure /cfg %windir%\inf\defltbase.inf /db defltbase.sdb /verbose
Having done all that, you should check to confirm if the issue is still prevalent after completing all these steps.
Frequently Asked Questions
How Do I Turn on the Audio Service?
To enable the audio service of your Windows 10, you need to go through these steps:
- Go to the Start menu.
- Proceed and select on Control Panel.
- Continue and select on Hardware and Sound.
- Manage Audio Devices.
- Under the Playback tab, select an audio device and click on the Properties button.
- In the Properties window that shows up, go to the Advanced tab and check Allow applications to take exclusive control of this device under the Exclusive Mode section.
- Click on Apply button and then OK.
- Close the Properties window and you’re all set.
How Do I Turn off the Audio Service?
To stop audio service, you need to go through these steps:
- Go to the Start Menu then select Control Panel.
- Proceed and select Hardware and Sound and proceed to the Manage Audio Devices section.
- When you get to the Playback tab, right-click on the audio device and select Disable.
- Click Yes in the pop-up that shows up to confirm the disable action.
- Close the Properties window and you’re all set.
Why is the Audio Service Not Running?
Audio service should be able to run automatically when your Windows 10 starts up without having to be initiated by you. The reason the audio service has stopped running is that your Audio Device has been disabled or set not to allow exclusive control by apps.
What Can I Do About Audio Service?
To solve this problem, follow the steps mentioned in “How Do I Turn on Audio Service?” and “How Do I Turn off Audio Service?” above to enable or disable your audio device. If you’re still unable to turn it on, then look at the other possible reasons and solutions mentioned in “Why is Audio Service Not Running?” below:
Reasons and Solutions:
- Your sound card driver might be incompatible with Audio Service. Try uninstalling your current sound card driver and reinstalling a new one. If none of them work, try downloading a new driver from your sound card’s manufacturer’s website.
- Your audio device might have been disabled in BIOS settings. Go to BIOS and check if there is an option for disabling Audio Device or setting it to Auto.
- Your system has gone into hibernation mode while trying to use Audio Service. Shut down your system completely and then restart it. It should work fine after that.
- You have recently installed software that has provided you with audio enhancement features, disabling the default Windows audio service temporarily until the changes are activated. To solve this problem, uninstall all audio enhancement software programs and restart your computer. The audio service should be up and running after that.
- If you are still unable to enable audio service, there might be some fault with the sound card hardware itself. Contact your computer manufacturer’s technical support team for assistance on how to get your audio device fixed or replaced.
How Do I Refresh My Audio Driver?
When an audio driver has been in use for a long time, it can sometimes become corrupt. To clear any corruption and refresh the drivers, you need to uninstall your sound card driver through the Device Manager.
To do so, follow these steps:
- Go to the Start menu or Control Panel, select Hardware, and Sound, and then Device Manager.
- Expand the Sound, video and game controllers category by clicking on it.
- Right-click on your sound card driver and select Uninstall.
- Click Yes in the pop-up that shows up to confirm a disable action.
- Restart your computer after uninstalling the soundcard.
- After restarting, Windows will reinstall the default audio driver for your system automatically.
- Now install the latest version of your soundcard driver along with any other drivers that it requires.
What Should I Do If the Audio Service Still Not Working?
If you are still having problems with Audio Service after following the instructions mentioned in the How to Enable/Disable Audio section, then it is recommended that you uninstall your current Internet browser and install a new one.
If none of them work, try browsing the web using another browser like Google Chrome or Mozilla Firefox and see if it helps.
If the problem persists, then you could try resetting your browser to default factory settings by deleting the browsing history, cache, and cookies that might lead to this error.
How Do I Reset the Sound on My Laptop?
If you are not happy with the sound quality of the speakers on your laptop, you can reset it to factory default settings.
To do so, follow these steps:
- Go into the Control Panel, select Hardware and Sound, and then Sound.
- Click on the Recording Tab.
- Right-click anywhere blank in this window and go to Show Disabled Devices.
- You will now see a list of additional audio devices like Stereo Mix or What You Hear.
- Right-click on those and enable them. You will now be able to use those as default recording devices.
- For headphones, go into Control Panel, and select Hardware, and Sound, and then Sound.
- Click on the Playback tab.
- Right-click anywhere blank in this window and go to Show Disabled Devices.
- You will now see a list of additional audio devices like Digital Output(S/PDIF) or Speakers/Headphones, right-click on those and enable them.
- Now your sound card is reset and you can enjoy listening to music with full volume.
Conclusion
The methods discussed in this article with the help you in solving the “The Audio Service is not running” on your computer once and for all. Try any of the methods and be sure of succeeding in solving the issue.


