

A screenshot is an image that shows the contents of a computer display. It can take of everything visible on the screen, including the entire desktop, open windows, menus, toolbars, or just a section of the screen. Screenshots are often used to show someone how to do something on a computer or to report an error message.
Do you need to take a screenshot of Lenovo? Whether you’re trying to capture an image of your computer screen or document, there are several ways to do it.
In this blog post, we will show you how to take a screenshot on Lenovo using keyboard shortcuts and some third-party screenshot-taking tools. We’ll also show you how to save and share your screenshots.
Let’s get started!
Method 1: Take Screenshot On Thinkpad With Windows 10
Follow these steps on how to screenshot on Thinkpad if you run Windows 10 on your Lenovo computer:
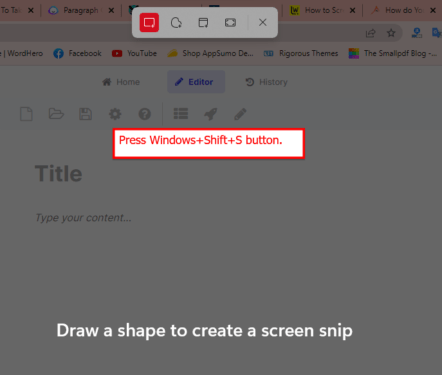
- To take a screenshot on your ThinkPad running Windows 10, press the “Windows key+Shift+S.” This will take a full-screen screenshot, which you can paste into any program that supports image files (such as Microsoft Paint).
- You can take a screenshot of a specific area of your screen by pressing the how to screenshot Lenovo. then click and drag to select the area you want to capture. Once you release the mouse button, the screenshot will be automatically saved to your clipboard.
- You can also take a screenshot of just one window by pressing Alt + Print Screen. This will take a screenshot of the active window, which you can then paste into any program that supports image files.
Method 2: Use Snagit Software To Take A Screenshot
Snagit is powerful yet easy-to-use screen capture software for Windows and Mac. Use Snagit to take a screenshot of your entire desktop, an active window, a specific region, or even a scrolling window. You can then easily edit the screenshot, add text and annotations, and save it in various formats.
Snagit also makes it easy to share screenshots with others, whether you’re sending an email or posting to a social media site. Best of all, Snagit is free to download and use.
If you need to take a screenshot with Snagit, then follow these steps:
- First of all, download and install this app to your Lenovo Laptop.
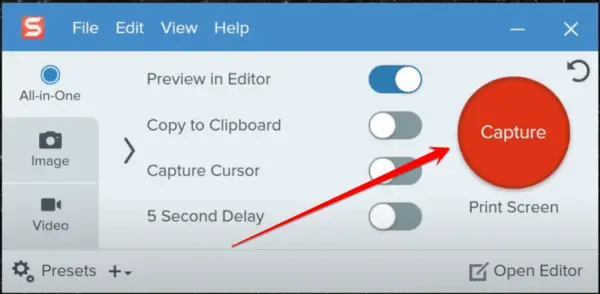
- After the launch of this app, you will come across an interface for this kind of application. You have to click on the big red button that says “Capture.”
- Now click and drag to select a custom area, then press and hold your mouse button.

- Here you have to click on the camera icon, which will capture the image of your selected place.

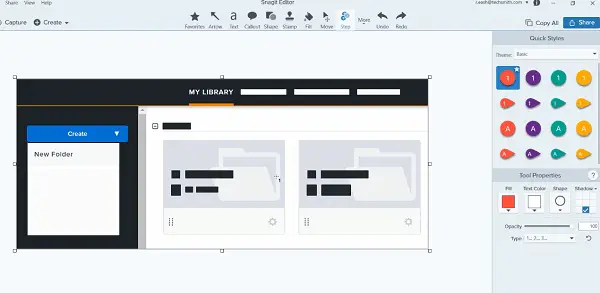
- In some internet browsers, edit a screenshot on the pop-up Snagit Editor. You can add shapes, text, effects, or adjustments to your screenshot.
Once you’ve done your custom editing of the captured image, you can save it to your computer by clicking the Ctrl + S button together.
Related: How To Restart Lenovo Laptop
Method 3: Take Lenovo Laptop Screenshot Using TinyTake Tool
Taking a screenshot on your Lenovo laptop is a great way to capture a moment or document something you see on your screen. There are a few different ways to take a screenshot on a Lenovo, but the easiest way is to use the TinyTake tool.
- To take a screenshot with TinyTake, you must download and install TinyTake software on your PC.
- After installing, you need to open this tool and log in with your Gmail account.
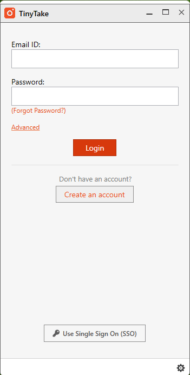
- After logging in, you will see the interface of this software. In which the “Capture Image” button will be created.
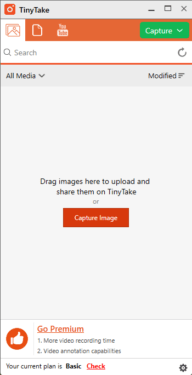
- As soon as you click on this button, four lines will appear in front of you, providing you with guidelines for capturing the image.
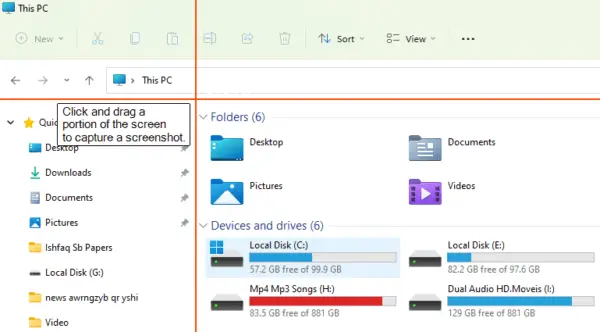
- After capturing the image of your desired surface, you will have more options in front of you in this tool for editing your image. Allows you to insert text, gestures, and shapes into your image.
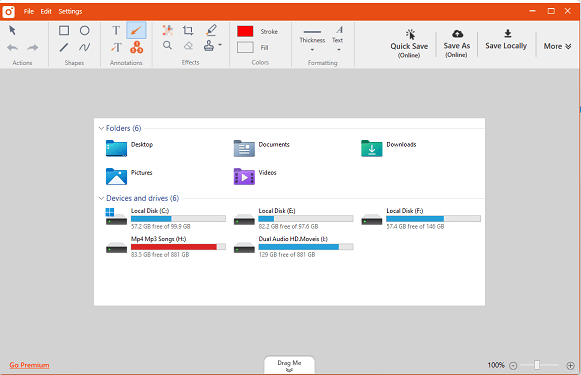
Taking screenshots with TinyTake is quick and easy, and it’s a great way to capture anything you see on your Lenovo laptop screen.
Method 4: Take A Screenshot Of The Whole Screen By Using Print Screen Command
The print screen command is a simple way to take screenshots. When you hit the print screen button, it will take a picture of your current screen and copy it to your clipboard. You can paste it into any image editing program, such as Microsoft Paint or Adobe Photoshop.
A print screen command is a useful tool for taking quick screenshots, but it has its limitations. For example, it can only capture the current screen, so if you want to take a screenshot of a specific window or area, you’ll need to use another method.
Note: The print screen command doesn’t allow you to edit the screenshot before saving it. If you want to add annotations or make other changes, you’ll need to do so in an image editor afterward.
Despite these limitations, the print screen command remains a handy tool for quickly capturing screenshots.
To take a screenshot of the whole screen by using the print screen command, you will need to follow these steps:
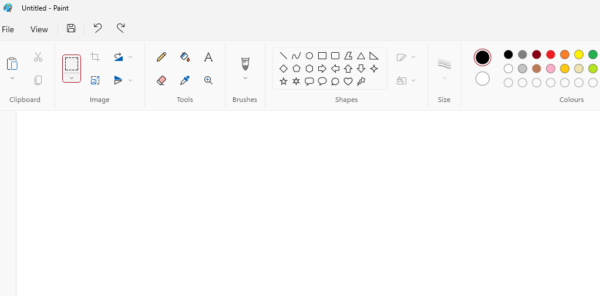
- Open an image editing program like Microsoft Paint.
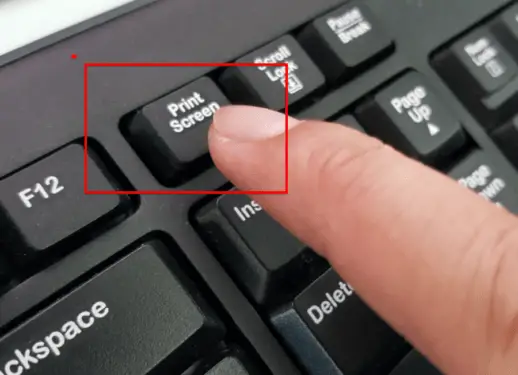
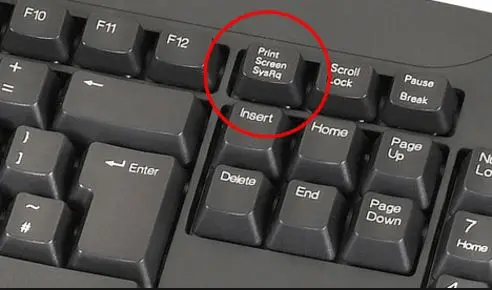
- Press the print screen button on your keyboard. This button is usually located near the top right of the keyboard.
- Press CTRL + V to paste the screenshot into the program.
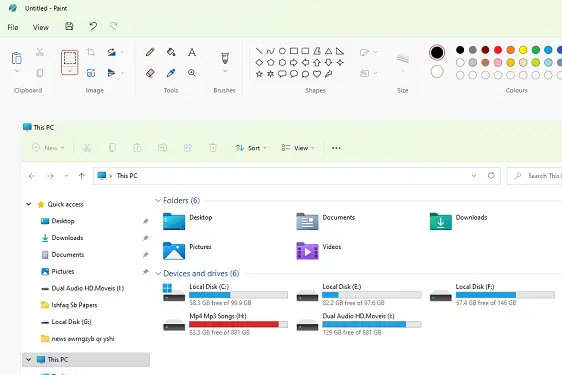
- Save the image to your computer.

By following these steps, you can take a screenshot of the entire screen. This can be useful if you want to capture something that is too large to fit on one screen or if you want to share a screenshot with someone else.
Related: My Lenovo Laptop Won’t Turn On
Method 5: Take A Screenshot Using The Snipping Tool
Microsoft Snipping Tool is a screenshot utility included in Windows Vista and later. It can take screenshots of an open window, rectangular area, or free-form area. It can also annotate screenshots before saving them.
Microsoft Snipping Tool has been a part of the Windows operating system for over a decade. It was first introduced in Windows Vista and has been included in every release since then.
In recent years, it has gained the ability to capture screenshots of open windows, rectangular areas, and free-form areas. It can also annotate screenshots before saving them.
Microsoft Snipping Tool is a valuable asset for anyone who needs to take screenshots frequently. Its ease of use and wide range of features make it one of the most popular screenshot utilities available.
The Snipping Tool is a Microsoft Windows built-in utility that allows you to take screenshots, either full screen or of a custom area. To launch the Snipping Tool:
- Open the Start menu and type “Snipping Tool” in the search box. Click on the Snipping Tool icon when it appears in the search results.
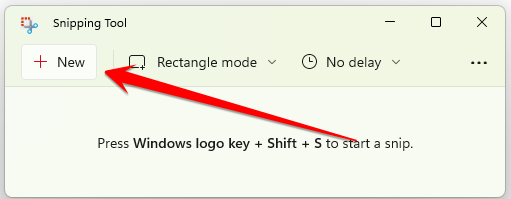
- Click on the New button in the Snipping Tool dialog box to take a screenshot.
- Your screen will be dimmed, and you will be able to select the area you want to capture using your mouse cursor.

- Once you have selected the area, release your mouse button, and the screenshot will be captured.
- You can then save, copy, or annotate your screenshot using the tools provided in the Snipping Tool dialog box.
Frequently Asked Questions
Where Do Screenshots Go On Lenovo?
By default, screenshots taken on a Lenovo laptop will be saved in the Pictures folder, in a sub-folder called Screenshots. If you open up this folder, you should see all of the screenshots you took on your laptop.
If you want to change where your screenshots are saved, you can go into the Settings app and select System > Storage. From here, you can change the location of the Screenshots folder to any other location on your hard drive.
What Is The Shortcut Key To Take Screenshot In Laptop?
The shortcut key to take screenshots on a laptop is by using the PrtScn button. This button is usually located on your keyboard’s top row of keys. When you press this button, it will capture an image of your entire screen and save it to your clipboard.
You can paste it into a document or image editing program and save it as a file. You can also use this shortcut to take a screenshot of just one window by pressing Alt + PrtScn. This will capture an active window image and save it to your clipboard.
Again, you can paste it into a document or image editing program to save it as a file. Taking screenshots is a great way to capture images of websites, error messages, or anything else you want to save for future reference.
So, next time you need to take a screenshot, remember to use the PrtScn button on your keyboard.
How Do I Recover A Screenshot Folder In Windows 10?
How do I recover a screenshot folder in Windows 10? This is a question that many users have asked. The answer is very simple. Windows 10 creates a folder called “Screenshots” in your “Pictures” folder.
If this folder has been deleted, you can easily recreate it by following these steps:
- Open the “Pictures” folder.
- Right-click on space and select “New > Folder.”
- Type “Screenshots” as the name of the folder and hit enter.
- You should now see the Screenshots folder in your Pictures directory.
If you have any screenshots saved in other locations, you can also move them to this new folder so they are all in one place. Having a separate Screenshots folder can be helpful if you want to keep your regular pictures and screenshots organized.
Hopefully, this article has helped you to recover your lost Screenshots folder in Windows 10.
How To Screenshot On Lenovo Laptop Without Printscreen Button?
It is straightforward to do. Simply follow these steps:
- Press the “Fn” key and the “PrintScreen” key simultaneously. This will take a screenshot of your current screen and save it to your clipboard.
- Open up an image editor (like Paint or Photoshop) and press CTRL + V to paste the screenshot.
- Save the image to your computer. That’s it! You’ve successfully taken a screenshot on your Lenovo laptop without the PrintScreen button.
How To Take A Screenshot On A Lenovo Chromebook?
How To Take A Screenshot On A Lenovo Chromebook? Chromebooks are equipped with a screenshot function that is very easy for users to utilize.
This is good news for everyone since taking screenshots is very useful, whether we need to show someone evidence of something or just capture an image to save for later. If you’ve ever wondered how to take a screenshot on your Lenovo Chromebook, here is a comprehensive guide.
Pressing the keys “Ctrl” + “Window Switch” will take a screenshot of your entire screen. This is the standard way to take screenshots on most laptops and computers. The file will automatically be saved in your “Downloads” folder. From there, you can do whatever you’d like with it – email, share, print, or even just keep it for yourself.
If you only want to capture a specific part of the screen, like a photo or conversation, you can use the partial screenshot function by pressing “Ctrl” + “Shift” + “Window Switch.” This will allow you to select only the portion of the screen that you want to capture.
Again, the file will be saved in your “Downloads” folder for easy access. Taking screenshots on Chromebook
What Is The Window Switcher Key On Lenovo Chromebook?
The window switcher key is a key on a Chromebook that allows you to switch between different windows quickly. This can be useful if you have multiple windows open and want to switch between them quickly.
The window switcher key is located in the top row of keys on the Chromebook keyboard, to the right of the spacebar. To use the window switcher key, simply press and hold it down, then use the arrow keys to select the window you want to switch to.
Release the window switcher key when you have selected the desired window.
Final Thoughts
Lenovo computers are popular options for people who want a quality computer without spending too much money. They also offer some great features, like the ability to take screenshots. That’s all there is to it! You now know how to take a screenshot on Lenovo. We hope this guide was helpful and easy to follow. Thanks for reading!


