

Hisense TVs are known for their high-quality picture and sound, but like any electronic device, they may experience issues. One common issue is blinking codes, which can indicate a problem with the power supply, signal, firmware, or overheating.
In this outline, I will discuss the causes of blinking codes on Hisense TVs and provide steps for troubleshooting and resolving the issue.
Common Causes of Blinking Codes
- Power supply issues: A blinking code can indicate a problem with the power supply, such as a malfunctioning power cord or a problem with the Hisense TV’s power supply circuit.
- Signal issues: A blinking code can also indicate a problem with the signal being received by the TV. A poor connection between the TV and the cable or satellite box, a weak signal, or a problem with the cable or satellite box itself could cause this.
- Firmware updates: In some cases, a blinking code can indicate that a firmware update is in progress or has failed.
- Overheating: If the TV is overheating, it may display a blinking code as a warning. This can be caused by a blocked ventilation system or the TV placed in a location with poor air circulation.
How To Troubleshoot Blinking Codes
1. Check the power supply
Ensure the power cord is securely plugged into the TV and the wall outlet. Eliminate the possibility of a malfunctioning cord or outlet by trying a different power cord and plugging it into another socket.
If the TV is connected to a power strip, plug it into the wall outlet.
2. Check the input signal
Ensure all cables are securely connected to the TV and the cable or satellite box. Try using a different HDMI cable or port on the TV to eliminate the possibility of a malfunctioning cable or port.
Check if the issue is with the cable, HDMI, or the source device, if the blinking code appears only when a certain HDMI is selected or when a certain device is connected.
3. Check for firmware updates
Check the Hisense TV’s menu for available firmware updates and install them if necessary. Ensure the TV is connected to the internet before updating the firmware.
4. Allow the TV to cool down
Ensure the TV is not placed in a location with poor air circulation. Check the TV’s ventilation system to ensure it is not blocked by dust or other debris.
If the above steps don’t help, it’s best to contact the customer support of Hisense for further assistance.
5. Test the Power Supply Board
The problem may lie with the power supply board. This component is responsible for receiving power from the wall outlet and distributing it to other TV parts, such as the main board, T-Con board, and controller board.
If a capacitor or diode on the power supply board has failed, it can prevent the power from being properly distributed to other components. This can lead to the TV not working at all.
To diagnose this issue, you can use a multimeter to test the voltage supply to the power board. However, if you’re uncomfortable working with electronics, it’s best to leave this task to a trained technician.
If the issue is really with the power supply board, replacing the faulty component can often solve the problem. However, it’s important to ensure that no other components are also faulty before making any repairs.
Hisense TV Red Light Blinks 2 Times
If your Hisense TV exhibits a double blink from its red light, there’s the potential for damaged LED backlight strips or an inoperative backlight inverter board. It is a common problem and can be easily fixed by replacing the strips.
However, in some cases, it could mean that the power supply board is malfunctioning. Switch out the LED backlight strips or install a new backlight inverter board to fix it. This will usually work about 90% of the time.
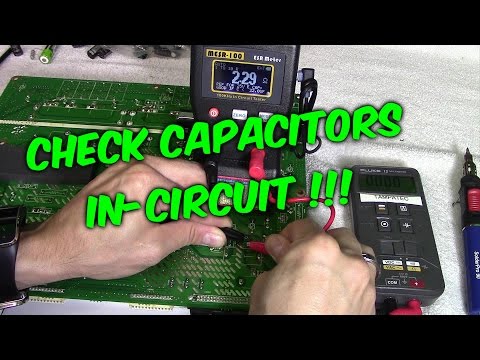
If that doesn’t do the trick, check for blown or bulging capacitors on the power board and replace them with equivalent ones. Be careful during this process since screens are very delicate.
Hisense TV Red Light Blinks 3 Times
If your Hisense TV red light blinks three times, it could indicate an LED rail shutdown caused by excessive voltage or current from a power surge. This can damage some lamps in the panel.
To determine which lamps are faulty, open your TV and test each with a 3V power source (such as two AA batteries). Once you have identified the ones that don’t light up, replace them. It will take longer but is much cheaper than replacing the entire LED strip.
However, this might not be a permanent solution as it may happen again due to a bad batch. It would help if you replaced your entire LED strip to get the best results – it is easier and more efficient.
Hisense TV Red Light Blinks 6 Times
If your Hisense TV red light blinks six times, you likely have a busted bulb. One or more of the LEDs on the lightbox behind the panel have burned out, prompting an automated shutdown from the system.
You might see a blue flashing light followed by the screen going black and then blinking red 6 times. To fix this, carefully open up the panels, then replace the bad bulbs individually or as a whole strip. If that doesn’t work, change out the IR sensors on the panel.
If you get a blue light before it shuts off with red 6 times, it’s best to bring it in for warranty repairs or buy a new TV since fixes could be too expensive otherwise.
Replacing the main, power, and T-con boards won’t help either.
Hisense TV Red Light Blinks 7 or 8 Times
It could be a backlight issue if your Hisense TV red light blinks 7 or 8 times with no picture. You may see 7 rapid blinks, 10 total blinks, or one slow blink followed by 7 rapid ones.
Test if you can hear sound coming from the TV when you press the power button. To determine if the backlight is not functioning properly, direct a flashlight onto the display and observe for faint images that are not visible. If this is present, it will confirm an inactive backlight.
To fix this, carefully open the TV and disassemble the LED panel. Access the backlight panel and test all LED strips for any faults. Replace the faulty bulb/strip with the same values as before, reassemble everything, and voila!
Hisense TV Red Light Blinks 9 Times
If your Hisense TV red light blinks 9 times, it indicates a backlight voltage issue. To fix this, refer to the earlier steps when the TV’s red light blinked 3, 7, or 8 times.
Hisense TV Red Light Blinks 10 Times
If your Hisense TV red light blinks 10 times, it can be caused by a bad LED driver/LED strips, faulty power board, or main board. First, test all the LED strips with either a LED tester or a battery to fix this. If all the LED strips are working, replace the LED driver on the power supply board.
You could also change out the power supply board entirely. You will likely need to switch out the main board if that doesn’t work. To narrow down the issue to the power or main board, use a meter to test each separately.
Both boards are plugged and play, so no soldering is required – unscrew the TV to locate the faulty board and replace it with a compatible one as needed.
How to Reset the Hisense TV
Unplugging the TV for a few minutes
Unplug the TV from the wall outlet and stay unplugged for at least five minutes. Plug the TV back in and turn it on. This will allow the TV to reset and resolve the issue.
Using the remote control to perform a factory reset
- Locate the “Menu” button on the remote control and press it.
- Navigate to the “System” or “Settings” menu.
- Look for the option to perform a factory reset or initialize the TV.
- Follow the prompts to complete the factory reset.
- Using the TV menu to perform a factory reset:
- Turn on the TV and navigate to the menu.
- Look for the option to perform a factory reset or initialize the TV.
- Follow the prompts to complete the factory reset.
It is important to note that performing a factory reset will erase all of the settings on the TV and return it to its original state, so you will need to set the TV up again and re-install any apps or channels you had previously installed.
Conclusion
Hisense TV blinking codes can indicate various issues, such as problems with the power supply, signal, software, and firmware. It’s important to troubleshoot the issue by following the manual’s steps or contacting the Roku support team.
By understanding the meaning of the blinking codes, you can quickly identify the problem and take the appropriate action to resolve it. It’s also important to note that different models may have different codes, so it’s always best to check the TV’s user manual or contact the Roku support team to determine the specific meaning of the blinking codes.
Remember to follow the troubleshooting steps in order, as some issues may have multiple causes, and addressing one issue may resolve the problem.


