

If you are a computer enthusiast, you will already know that ACPI is one of the best features you can get on your motherboard. Not only does it help you save battery and power on laptops, but it also has a big impact on your computer’s performance.
In recent years, it has become more and more popular; most new motherboards support it. This is excellent news for gamers since there are many things you can do with ACPI to improve your games’ performance.
This article will focus on the three things you can do with ACPI to boost your computer’s performance: overclocking, underclocking, and power-saving features. Although we will focus on games in this article, you can apply these tips for everyday computer use.
But first thing first.
What is ACPI x64-based PC?
When you buy or build an ACPI x64 based PC, it dictates the operating system communication to distribute power to different parts of your computer, including the hard drive. Originally, it was installed on laptops to help save power and battery life.
Since Windows 98, ACPI has been present in almost all Windows computers, replacing APM (Advanced Power Management) in every Windows Vista operating system.
Every operating system has its own ACPI version. Windows 8 uses ACPI 5.0; Windows 7 uses 4.0, etc. The number behind the acronym is the ACPI version. If you are looking for the best performance, it’s important to determine which version your motherboard supports since not all motherboards are created equal.
If you’re building a new computer, make sure your motherboard supports the latest version of ACPI to take full advantage of your motherboard’s features.
ACPI Power States
ACPI defines five different power states your computer can be in, each with its power consumption.
Standby (S3) and Sleep (S4)
The first two are Standby (S3) and Sleep (S4). The difference is that your computer is still running in S3, but most of its components are turned off. In S4, it is completely turned off, and you cannot use your computer until you wake it up.
ACPI Hibernation (S5)
The third power state is the ACPI Hibernation (S5), which saves your computer’s state on your hard drive and completely turns it off. It consumes the same power as an OFF state but is slightly faster than standby or sleep modes.
G2/S5 Soft Off and G3 Mechanical Off
The next two states are the G2/S5 Soft Off and G3 Mechanical Off. Hibernation states are also called because your computer is off, but it’s faster to turn on than a complete shutdown.
This is because it shuts down only parts of your computer instead of every part simultaneously, allowing it to boot faster without losing its state.
C0 (Working), C1E (Sleeping), and C3/C6 (Hibernation)
The last and most important power states to gamers are the three performance states: C0 (Working), C1E (Sleeping), and C3/C6 (Hibernation).
The first performance state is the C0, the “Working State” or the “Working Set Size.” It’s used when you are actively using your computer. It consumes exactly as much power as it needs to keep your computer running at its best performance.
The next state is the C1E or Sleeping State. It’s called “sleeping” because it’s a low-power sleep state with minimal power. The difference between it and the normal sleeping state is that your computer will enter this power-saving state faster since it does not have to save the state of your computer.
The last performance state is C3/C6 (Hibernation). If you are not using it for 30 minutes, your computer will enter this state. All your programs and applications are saved to your hard drive so that when you return to your computer, it will be mostly turned on.
You can see these power-saving features in action by opening your Device Manager (search in Windows Search) and going to the Power Options section.
ACPI X64 Based PC Driver Update
When you build a new computer with Windows 8/8.1/10 pre-installed, your computer will have the latest version of ACPI. But if you upgrade to Windows 10 or build a new computer with Windows 7/8.1, your computer will have ACPI 4.0, the older version of the five power states listed above.
Every time a new version of Windows is released, it’s essential to upgrade your ACPI driver, too. This will ensure you’re taking full advantage of your computer’s power-saving features and getting the best out of your PC.
Every time you upgrade to a new version of Windows, make sure you also upgrade your ACPI x64-based PC drivers to ensure maximum performance and power saving.
You can set it to auto-update for maximum convenience or check for updates manually.
Why is ACPI Required?
That’s all fine, but what’s the point of all this? ACPI is required to give your computer the ability to save power when you aren’t using it. If your ACPI driver is missing, Windows will function as if each power state did not exist.
ACPI driver will calibrate your computer’s components and detect how much energy is necessary to keep them running at their peak performance.
Since this driver is essential to your computer’s power-saving features, it’s required for Windows to function correctly and stop applications from shutting down unexpectedly.
The ACPI driver is essential for Windows to function correctly. It also helps your computer use the power-saving features built into it. Over time, an ACPI driver update is necessary to keep a stable system and a good performance.
What Does ACPI Compliant Mean?
If your computer does not have ACPI installed, it will not have the power-saving features that Windows has, and it will not be capable of using the battery properly. It will also be unable to manage power throughout your system, affecting your PC’s performance.
If your computer meets the Windows Logo requirements for ACPI, your hardware is ACPI compliant, and Windows has the drivers it needs to power on your computer.
ACPI is not an optional component in Windows since it’s required for all Windows’s power-saving features.
Your computer must have ACPI, and your operating system must be compatible for this technology to work.
How Do I Disable ACPI in Windows 10?
For some reason, you may need to disable ACPI in Windows 10. If your computer is not supported by Windows 8/8.1/10, it may have ACPI enabled.
In some specific cases, you might want to disable ACPI to change the power setting on your computer to “Maximum Performance.”
If you disable ACPI and then configure your power plan to use High Performance, your PC will work as an average computer does.
To disable ACPI in Windows 10:
- Right-click on the Start button.
- Open the Device Manager.
- Expand the battery box in Device Manager.
- Right-click on the Microsoft ACPI device.
- Now choose Uninstall.
- Restart your computer.
You will see that the ACPI device is now gone from your Device Manager.
The specific cases that we mentioned above, where you might need to disable ACPI, are:
- When your laptop is not charging, and it is running on battery.
- When your computer is not charging, and you do not want to use the power-saving features of ACPI.
In this case, simply disabling ACPI will surely help. If your computer is not compatible with Windows 7/8/10, disabling ACPI can allow you to upgrade your operating system.
What is an ACPI Driver?
An ACPI driver is a software program that allows your computer to communicate with the hardware. This may not sound like something you need, but there are several benefits to having an ACPI driver.
- Windows uses an ACPI driver to help control power features and manage resources on your computer.
- ACPI drivers communicate between hardware components and Windows, allowing Windows to manage resources on your computer effectively.
ACPI drivers are installed on all compatible Windows operating systems. They allow your computer to save power when it’s not being used, allowing Windows to manage resources on your computer. They also help Windows to function correctly and control power-saving features.
Windows can control power-saving features such as screen brightness and hard drive spin down when your computer uses ACPI.
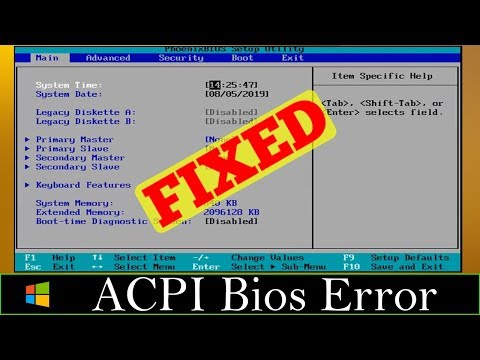
What is ACPI BIOS Error?
The BIOS is a set of instructions that tell your computer how to perform essential functions. The ACPI component in the BIOS helps Windows communicate with your computer’s hardware.

When your computer’s ACPI function is not working correctly, it affects many different features in Windows. For example, your screen brightness may be incorrect, your hard drive may stay on longer than it should, and hibernation may not work correctly.
The ACPI BIOS error message appears when there is a problem with your computer’s ACPI function.
When you receive this error message, it means that Windows can’t communicate properly with your computer’s hardware, and in most cases, this is because of a faulty BIOS.
The following are the reasons why you may receive the “ACPI BIOS error” message:
| Outdated BIOS Version | If you have an outdated BIOS version on your computer, Windows may not be able to communicate with your hardware, which can cause ACPI problems. |
| When you install Windows 10 | If you’ve been hibernating your PC for a while and then resume it, you’ll get an ACPI BSOD if any modifications have been made, such as adding RAM. To resolve this, go back to RAM and see if it has any fault. If not, remove the overclock settings, and you are probably good to go. |
| When you use Windows 8 and Windows 7 | Yes, apart from Windows 10, you will also encounter the same problem if your computer’s BIOS version does not support Windows 8 or Windows 7. You will encounter errors like ACPI_BIOS_FATAL_ERROR. You’re resuming PC after a period of hibernation: If you have made some changes to your PC during the hibernation, for instance, add RAM, you’ll receive the ACPI BSOD error after resuming it. At this time, please go to scan the RAM (check whether it is faulty) and remove the overclock settings to have a try. |
| Resuming your PC after a long hibernation | If you’ve been hibernating your PC for a while and then resume it, you’ll get an ACPI BSOD if any modifications have been made, such as adding RAM. To resolve this, go back to RAM and see if there is some fault with it. If not, remove the overclock settings, and you are probably good to go. |
How Do I Fix My ACPI Driver?
If you receive the “ACPI BIOS Error,” there are several things that you can try and fix:
Change Your Settings
You can change your settings and see if it will fix the problem.
- Click the Start button.
- Type Change advanced power settings and press Enter.
- You may make changes to your BIOS settings, such as turning off C1E support.
- If you are positive about making these changes, you should always remember to save them before restarting your computer, or all of your changes will be lost.
You can also try changing the ACPI driver settings in your computer if you use Windows 8 or 10. You can try disabling the ACPI driver and restarting your computer.
Reinstall Your Device Drivers
If you are using Windows 8 or Windows 10, you can try reinstalling the ACPI driver for your computer. You can download and install the latest device drivers for your hardware.
Back Up and System Restore
If you are using Windows 7 or 8, you can try the system restore feature. It is possible that your computer’s ACPI function may not be working correctly because of a system change that you may have made.
To back up your computer before restoring, go to Start > Control Panel > System & Security > System > select the System Protection tab > System Restore.
You can also try restoring to an earlier point of time when ACPI functioned correctly on your computer.
Reinstall Windows
If nothing works, you have to reinstall your operating system. You can try using the “upgrade” option if available on your computer. You can then upgrade to another edition of Windows rather than perform a clean installation.
If you are unable to grasp information with text, follow this explanatory video to resolve your issue:
What is ACPI 5?
ACPI 5 is an updated version of the ACPI specification. It has several enhancements over ACPI 4.0, including:
- Support for new processor types, including Intel Haswell and AMD Jaguar processors.
- Full support for the power management of devices based on PCI bus protocols.
- The ACPI 5.0 standard allows for SoC-based mobile platforms that run Windows 8 and later and Windows Server 2016 and later.
- It also supports many helpful features in earlier versions of Windows.
Conclusion
The ACPI x64-Based PC error may occur for several reasons, but the most prominent are BIOS issues and resuming your computer after a long hibernation.
If you encounter ACPI x64-based PC motherboard error, try to solve the problem by changing your BIOS settings. If that doesn’t work, try reinstalling your device drivers.
If you want to avoid these problems in the future, make sure that your computer’s BIOS version supports Windows 8 or Windows 10 operating system. If you’re unsure, research your computer’s specifications before buying a new one.


