

When you keep getting the “DNS Probe Finished No Internet” error, it can be frustrating because it means you cannot access the internet. Various things can cause errors and hinder your ability to connect to the internet.
It makes you feel helpless, especially if you need to use the internet for work or school. Accessing the internet is a basic necessity in today’s world, and being unable to do so can be very stressful.
What Does It Mean When It Says DNS Probe Finished No Internet?
Every time you need to connect to the internet, your computer requests a specific website using DNS. This is an internet address, usually handled by your internet service provider (ISP). But sometimes, this process fails, leaving you with nothing but the error on your screen.
Many things can cause the error, like when you’ve moved house or changed ISPs. It might mean that your DNS server is not working properly or your internet connection is unstable. Sometimes it can be caused by a problem with your ISP.
The ‘DNS Probe Finished No Internet’ error can be annoying and prevent you from accessing the internet. The issue can also cause problems with online games, streaming services, or VPNs if configured properly.
Methods To Fix DNS Probe Finished No Internet
If you’re wondering why your computer may be losing network connections, there are a few potential causes. These include ISPs overloading the DNS Network, malware altering your DNS settings without you knowing, or a completely incorrect internet connection configuration.
Though the latter two causes could lead to serious security concerns, the following are the best methods on how to fix them the error:
1. Restart Your Computer
Sometimes, the issue results from a software or hardware conflict. If your computer keeps losing internet access and you do not know why your first step should be restarting your computer. A software program on your system may have caused the problem.
Once you restart your computer, any conflicting programs should no longer cause issues. The process of restarting your computer includes the following:
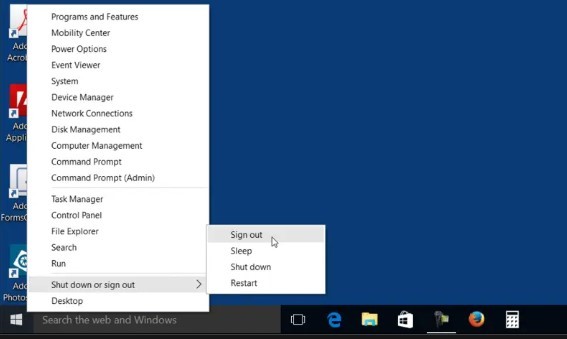
- On Windows – Click on the Start menu. Select the Power icon and then click on Restart.
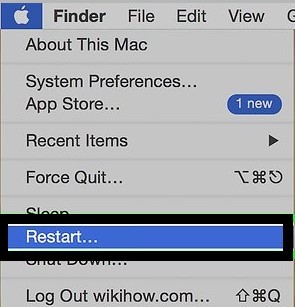
- On Mac – Click on the Apple icon in the upper left corner of your screen. Select Restart from the drop-down menu.
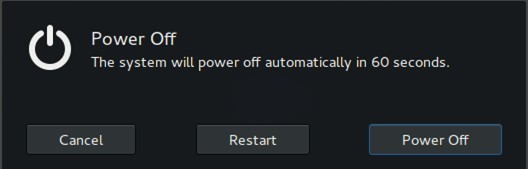
- On Linux – Click on the user menu in the upper right corner of your screen. Select Restart from the drop-down menu.
2. Check Your Internet Connection

If you still have the error, it’s time to check your internet connection. There are a few things you can do to check if your internet connection is working properly:
- Check if your computer is connected to the internet. If your computer is not connected to the internet, you won’t be able to access any websites. To check if your computer is connected to the internet, open your web browser and try to access a website.
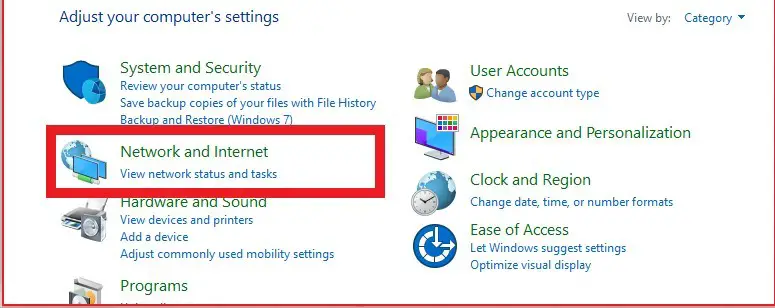
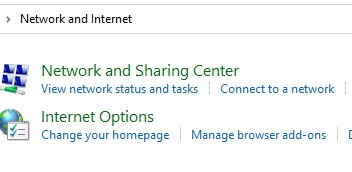
- Check if your router is connected to the internet. You can do this by going to your router’s web interface. The web interface is usually accessed by typing your router’s IP address into a web browser.

If you’re unsure what your router’s IP address is, check it by going to your computer’s control panel and looking under Network and Sharing Center.
Once you’re logged into your router’s web interface, check for an internet connection. If there is, then your router is most likely not the problem.
- Check if your modem is connected to the internet. If you’re using a DSL or cable modem, you can check if it’s connected to the internet by opening your web browser and navigating a website. If the website loads, then your modem is connected to the internet.
- Check if your ISP is experiencing an outage. The ISP or Internet Service Provider might be the one to blame for this error. This is especially true if other devices connected to the same network as your computer can also not connect to the internet or are experiencing slow speeds.
If you think your ISP might be at fault, you can try contacting their customer support to see if there’s an ongoing outage in your area.
3. Check Your DNS Settings
DNS servers translate between your computer’s location and the web address you’re trying to visit. Sometimes, these servers can have issues that cause internet errors.
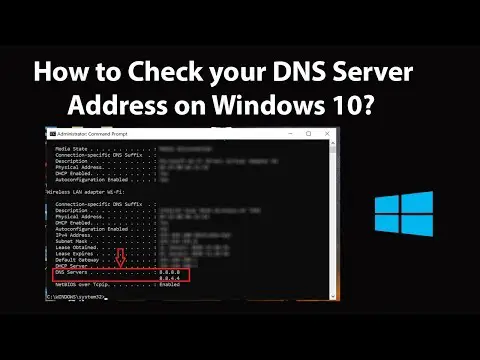
To check your DNS settings:
- Open the Control Panel.
- Click on Network and Internet.
- Click on View network status and tasks.
- Click on Change adapter settings.
- Right-click on your active connection and select Properties.
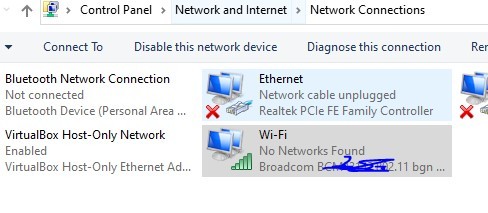
- Select Internet Protocol Version 4 (TCP/IPv4) and click the Properties button.

- In the General tab, select Obtain DNS server address automatically.
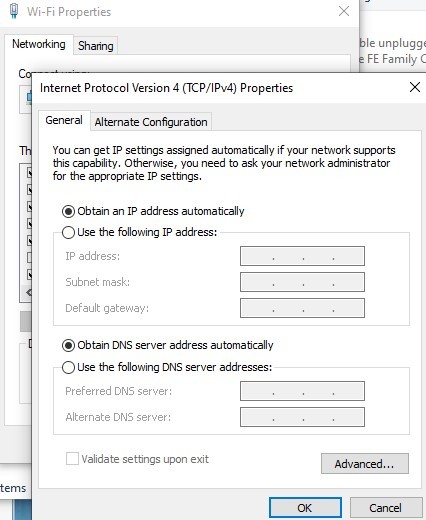
- Click OK to save your changes.
4. Clear Your DNS Cache
Another way to fix the error is to clear your DNS cache. When your computer stores the DNS data of a website, it’s called a DNS cache. If this data gets corrupted or outdated, you may experience problems accessing certain websites.
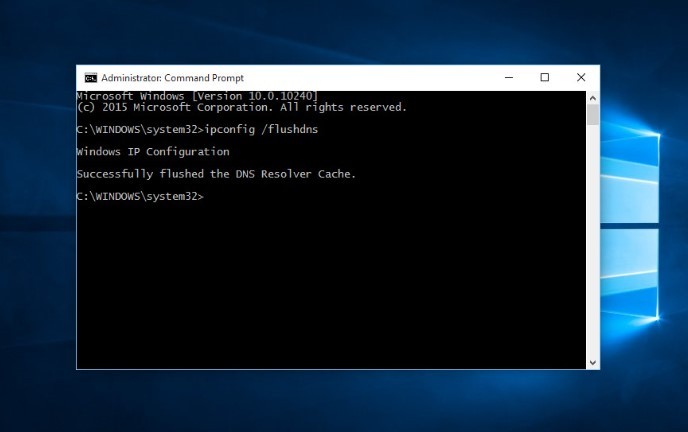
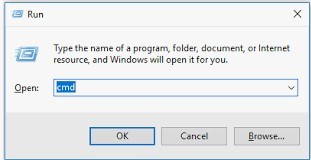
You can use the command prompt to clear your DNS cache in Windows. First, open the command prompt by typing “cmd” into the Start menu. Then, type the following command and press Enter:
ipconfig /flushdns5. Reset Your TCP/IP Settings
The settings of your TCP/IP protocol may cause your error. This can happen if your computer picks up the wrong DNS settings from your router.
To reset your TCP/IP settings:
- Open the Command Prompt by typing “cmd” into the Start menu.
- Type the below commands and press enter after typing each:
netsh int ip reset
netsh winsock reset- Restart your computer.
6. Reset Your Winsock Catalog
Winsock is a technical specification that defines how Windows network software should access network services, especially TCP/IP. This Winsock reset will reinitialize your IP stack and clear any bad configurations causing the DNS server error.
It’s like resetting your computer’s network settings to the factory defaults.
To reset your Winsock catalog:
- Close all open applications.
- Press the Windows key + R to open Run.
- Type cmd and press Enter to launch Command Prompt.
- In the Cmd and type: netsh winsock reset

- Press Enter. You will see a message that says, “Successfully reset the Winsock Catalog.”
- Reboot your computer.
7. Edit Your Hosts File
The hosts’ file is a text file that maps hostnames to IP addresses. If there’s a problem with your hosts’ file, it could be causing DNS problems. This is a rare problem, but it’s worth checking if you can’t determine why DNS isn’t working.
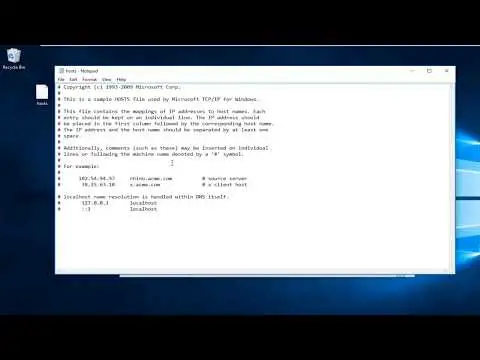
To edit your hosts file, you’ll need to use a text editor like Notepad or TextEdit. The hosts file is located in a different place depending on your operating system:
Windows: c:\windows\system32\drivers\etc\hosts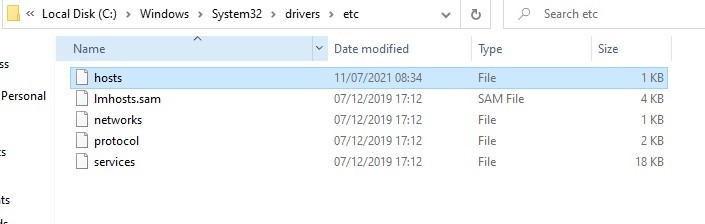
Mac: /private/etc/hostsLinux: /etc/hostsOnce you’ve opened the hosts file, look for any lines commented out with a hashtag (#). If there are any, uncomment them by removing the hashtag. Then, save the file and try loading a website again.
8. Disable Your Firewall
Firewall software is designed to protect your device from internet threats. However, the firewall can sometimes block legitimate programs and cause an error. To check if your firewall is the root of the problem, you can try temporarily disabling it and see if that solves it.

If you’re using the built-in Windows Firewall, you can disable it by following these steps:
- Press the Windows key + R to open the Run dialog box.
- Type in “control” and click OK to launch the Control Panel.
- Go to System and Security > Windows Firewall.
- Click the Turn Windows Firewall on or off option on the left-hand side.
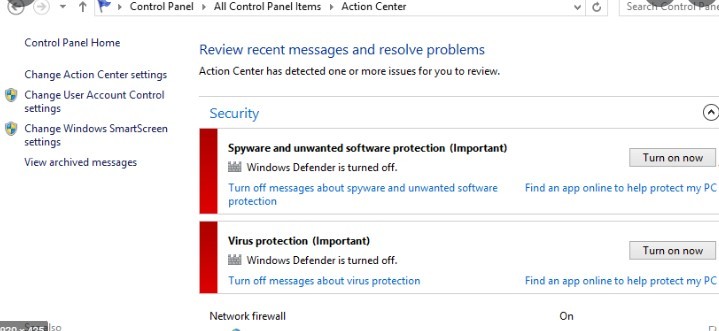
- Select the Turn off Windows Firewall (not recommended) option for private and public networks and click OK.
If you’re using a third-party firewall program, consult its documentation to learn how to disable it.
Once you’ve disabled the firewall, try accessing the internet again and see if the problem has been resolved. If it has, you can add an exception for your browser in the firewall settings to make sure it’s not blocked in the future.
9. Restart Your Router or Modem
Overheating can also be a reason for your modem or router to malfunction. In this case, you will have to unplug your router or modem from the power outlet and then plug it back in. This will help you restart your router or modem and hopefully fix the DNS probe without an internet issue.
10. Update Your Network Adapter Drivers
Your drivers might be outdated, which can lead to this problem. You should check for updates and install them on your computer. The drivers allow your computer to communicate with your network properly.
You can update your drivers automatically using Driver Easy or manually download and install them from the manufacturer’s website. To update the drivers manually, follow these steps;
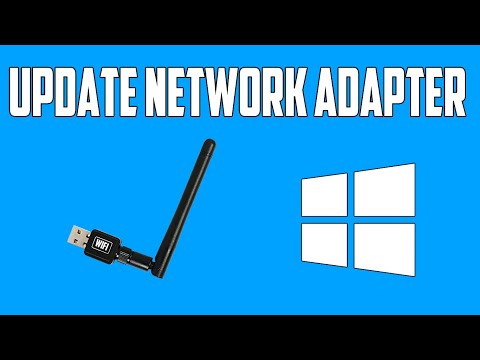
- Go to Device Manager.
- Expand Network Adapters, right-click on your network adapter, and select Update Driver Software.
- In the pop-up window, select update the driver automatically. The drivers will take time to install but make sure you wait.
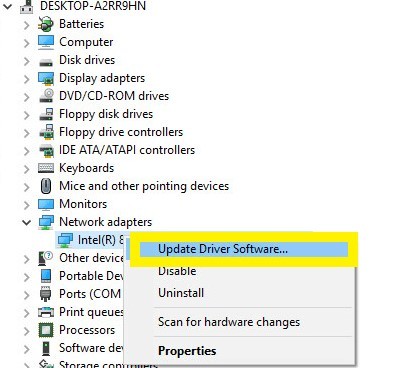
- Once the process is completed, restart your computer and check if the issue is resolved.
If you don’t have time or patience to update the drivers manually, you can do it automatically with Driver Easy. Driver Easy will automatically search and get the right drivers for your network adapter and your Windows version, and it will download and install them correctly:
- Download and install Driver Easy.
- Run Driver Easy and click the Scan Now button. Driver Easy will then scan your computer and detect any problem drivers.
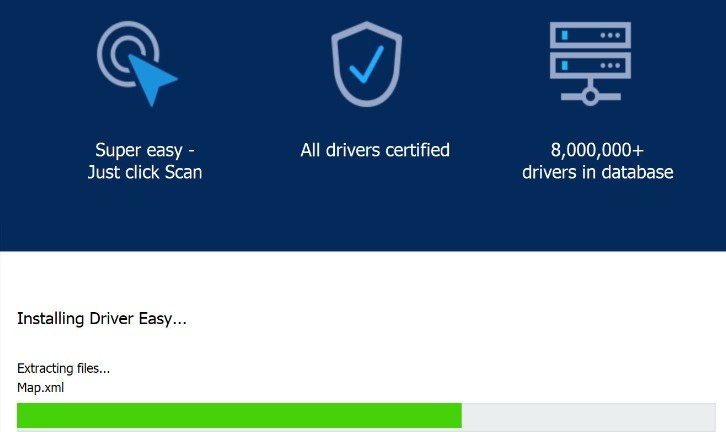
- Click Update All to automatically download and install the correct version of your system’s missing or out-of-date drivers.

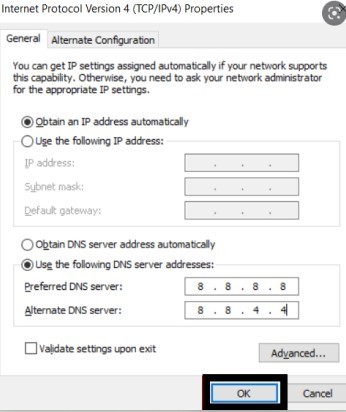
11. Change DNS Server Settings
If you’re connected to the internet wirelessly, chances are you’re using a DNS server supplied by your ISP. However, these servers can sometimes be slow, unreliable, or blocked. In these cases, you may want to switch to a public DNS server like Google Public DNS or OpenDNS.
To change your DNS server on Windows, follow these steps:
- Go to Control Panel > Network and Internet > Network Connections.
- Right-click your active connection and select Properties.
- Double-click “Internet Protocol Version 4 (TCP/IPv4)” and enter the DNS server addresses you want to use.
On macOS, follow these steps:
- Open System Preferences > Network.
- Select your active connection on the left, then click the “Advanced” button.
- Go to the “DNS” tab and enter the DNS server addresses you want to use.
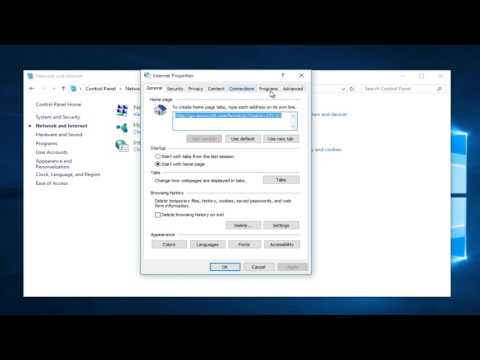
12. Disable Proxy Servers
Proxy servers can provide an additional layer of security by filtering out incoming requests and blocking malicious or unwanted traffic. However, they can also introduce delays and increase the risk of errors.
If you’re having trouble connecting to the internet, disabling the proxy server settings is worth trying.
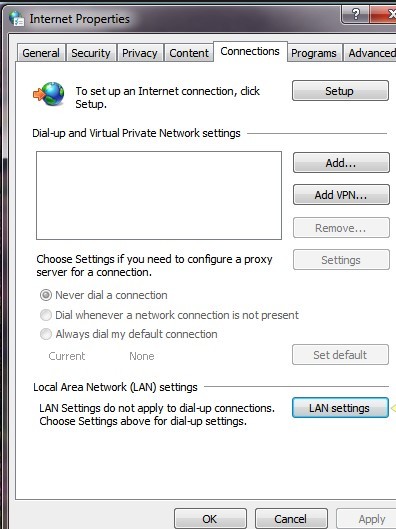
To do this on Windows, follow these steps:
- Go to Control Panel > Network and Internet > Internet Options.
- You should click “LAN settings” from the ‘Connections‘ tap.
- Uncheck the “Use a proxy server for your LAN” option and click “OK“.
On macOS, follow these steps:
- Open System Preferences > Network.
- Select your active connection on the left, then click the “Advanced” button.
- Go to the “Proxies” tab and uncheck all of the options.
How Do I Flush My DNS Cache?
One of the first things you should do when fixing DNS problems is flush your DNS cache. This will clear out any old DNS data that may be causing problems.
To flush your DNS cache in Windows, open the Command Prompt and type this command:
ipconfig /flushdnsFor Mac users, open the Terminal and type this command:
dscacheutil -flushcacheHow Do I Flush My DNS?
If you’re experiencing issues with your internet connection, one possible cause could be a corrupted DNS cache. To fix this, you can flush your DNS cache. This will clear out any outdated or incorrect DNS information your computer may have stored and force it to fetch the most up-to-date information from your ISP.
Depending on your operating system, there are a few different ways to flush your DNS cache. For Windows users, the process is relatively simple. Just open up the Command Prompt (you can do this by searching for “cmd” in the Start Menu) and type the following command:
ipconfig /flushdnsThis will clear your DNS cache and hopefully fix any connection issues you were having.
How Do I Force DNS To Update?
You can usually force DNS to update by flushing the DNS cache. On Windows, you can do this by opening the Command Prompt and running this command:
ipconfig /flushdnsYou can flush the DNS cache on Mac by opening the Terminal and running this command:
dscacheutil -flushcacheOnce you’ve flushed the DNS cache, try accessing the website again to see if the new DNS record has been propagated.
How Do I Fix DNS Resolution Failure On Mac?
DNS resolution failure on Mac can be a frustrating experience. To fix this problem, try the following steps:
- Make sure that your DNS settings are correct. The most common cause of DNS resolution failure is incorrect DNS settings. To check your DNS settings, open System Preferences and click on the Network icon. Select your active network connection and click the Advanced button. Make sure that the DNS servers are set to the correct values.
- Try using a different DNS server. If your DNS settings are correct but you still have trouble resolving DNS names, try using a different DNS server. You can use Google Public DNS or OpenDNS.
- Flush the DNS cache. If you’re still having trouble, try flushing the DNS cache. This will clear any cached DNS data and may resolve the issue.
- Restart your computer. If you’ve tried all the above and are still having trouble, restart your computer. This will clear any DNS data that may be cached on your computer.
Frequently Asked Questions
What Does Flushing DNS Cache Do?
Flushing your DNS cache can be a useful troubleshooting step when you’re experiencing web page loading problems. This action clears the DNS resolver cache on your computer and can help resolve domain name issues.
Why Is Google DNS Not Working?
If you’re having trouble connecting to the internet, it could be because your DNS settings are misconfigured. One way to fix this is to use Google DNS. However, sometimes Google DNS can stop working, too.
There are a few reasons why this might happen. It could be a problem with your computer’s DNS cache or an issue with how Google DNS is set up. In some cases, it might be a problem with your ISP.
Whatever the reason, you can try a few things to get Google DNS working again. First, you can try clearing your DNS cache. This will remove any old DNS information that might be causing problems.
If that doesn’t work, you can try changing your DNS settings. You can do this in your computer’s network settings. Just change the DNS server to 8.8.8.8, Google’s public DNS server.
You can try using a different DNS server if that doesn’t work. There are many to choose from, but we recommend using Cloudflare’s 1.1.1.1 DNS server.
Finally, if nothing else works, you can contact your ISP. They might be able to help you troubleshoot the issue.
Can Virus Cause DNS Issues?
Yes, a virus can cause DNS issues. If a virus infects your computer, it can change your DNS settings so you cannot connect to the internet or certain websites. This can be a major inconvenience, and it can also be dangerous if you’re unable to access important sites like your bank or email.
If you think you may have a virus, running a virus scan and removing any infected files as soon as possible is important.
Conclusion
DNS is an important part of how the internet works, and DNS issues can be a major headache. Thankfully, you can do a few things to troubleshoot DNS issues. The above guide should help you fix most DNS problems.
However, if you’re still having trouble, you may require to contact your ISP or a computer technician for further assistance.


